Part 1 - How to setup Ozeki Phone System on your Windows PC
Ozeki Phone System is a professional PBX system that provides revolutionary VoIP, SMS and Web functionalities. In order to use the next-generation technology you only need to install the software. The whole process is really simple and only takes a few minutes. After you have finished the installation procedure, your PBX is ready to use.
For using Ozeki Phone System, follow 3 simple steps:
 ✔ Part 1: Install Ozeki Phone System on your Windows PC (Download from here)
✔ Part 2: Connect Ozeki Phone System to the telephone network
✔ Part 3: Connect your devices to Ozeki Phone System
Download and Install Ozeki Phone System
In this video, we are going to show you how you can install the Ozeki Phone System. The video will start with the download page of the Ozeki Phone System and will end with the software installed on your computer. In the process, you are going to learn how to download the installer and how to launch it. The video is only 50 seconds long and it is presented in a very detailed way. You will have no problem with following the process.
Visit the download page
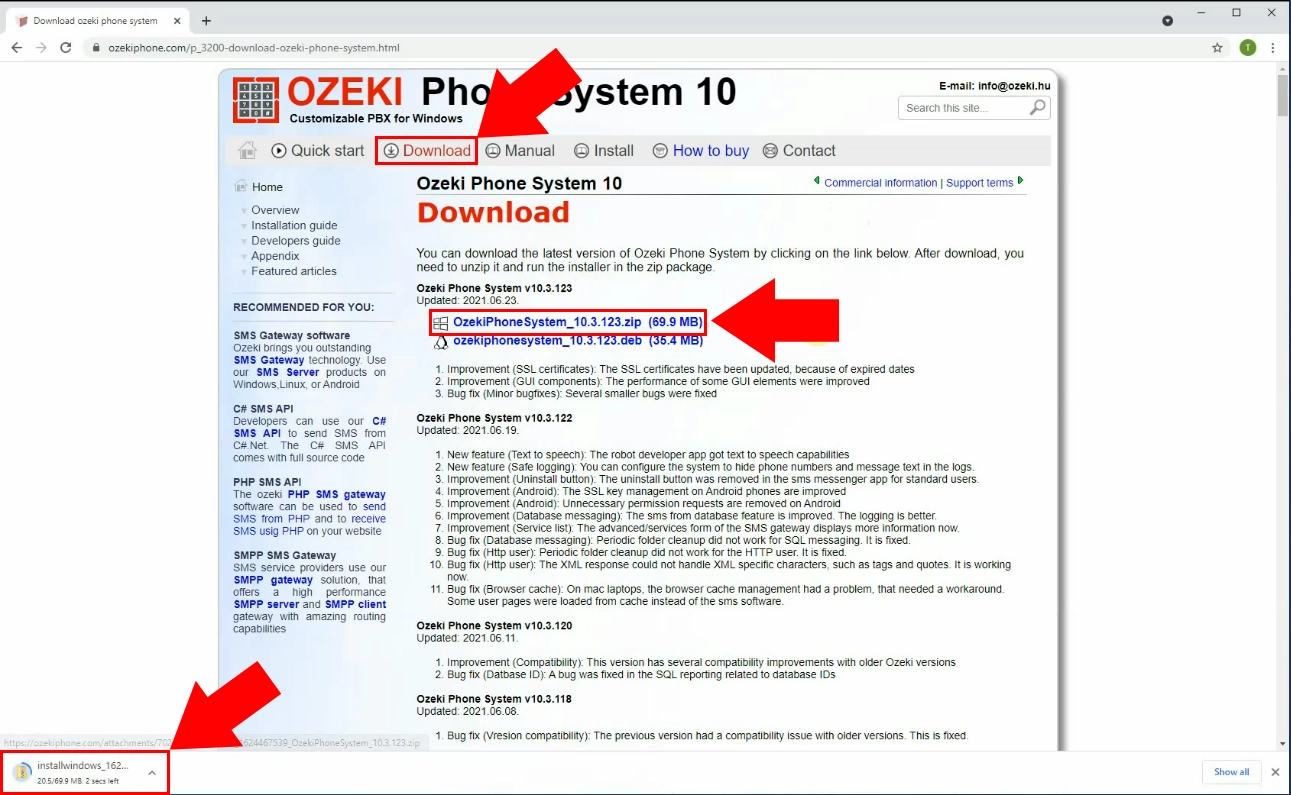
The first step of the installation procedure is to visit the Download page of the Ozeki Phone System. there, you will find two links, on for Linux and one for Windows (Figure 1). In this case, choose the Windows option. Click the link and your browser will start downloading the necessary files.
Run the installer
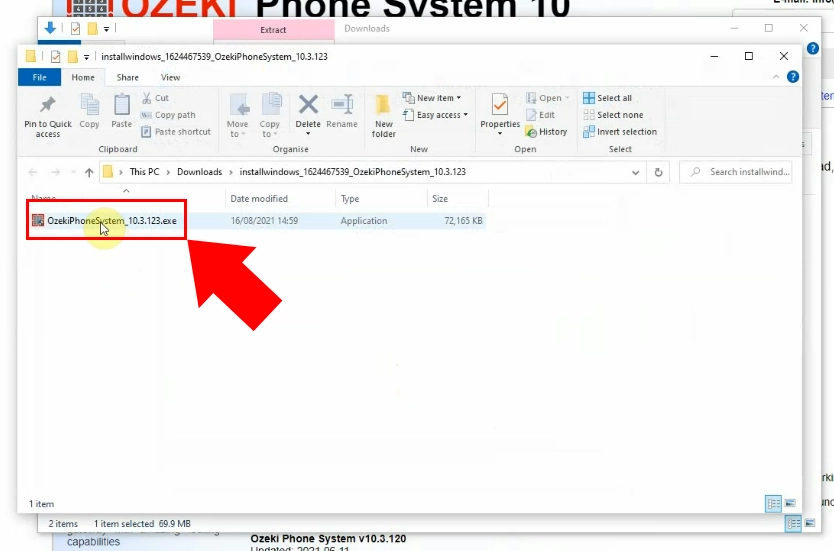
If you have the installer downloaded on your computer, you can start the installation procedure. The installer will be located in the 'Downloads' folder of your computer by default. Click the application to start the installation. The installer should be named 'OzekiPhoneSystem_versionnumber.exe'.
Welcome page
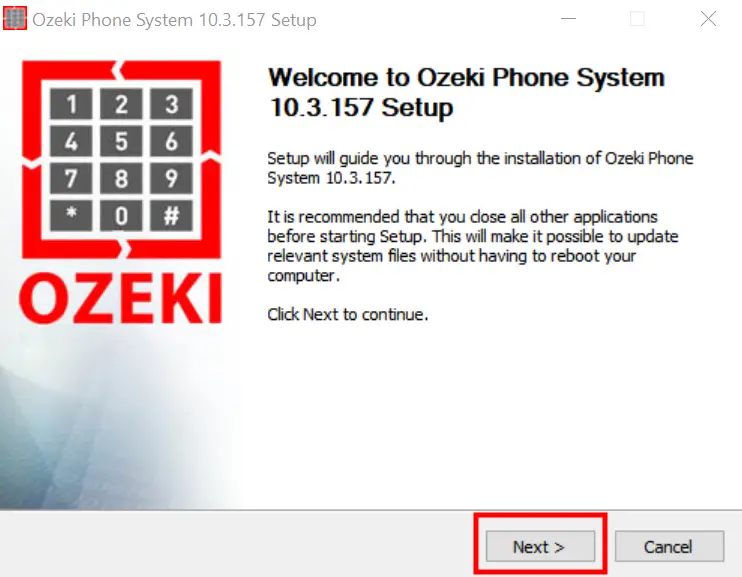
On Figure 3, you can see the welcome page of the installer. Your only task here to do is clicking the 'Next >' button on the bottom of the welcome page. This will take you to the next step of the installation. You can also get more information about the installation process here on this page.
Accept the license agreement
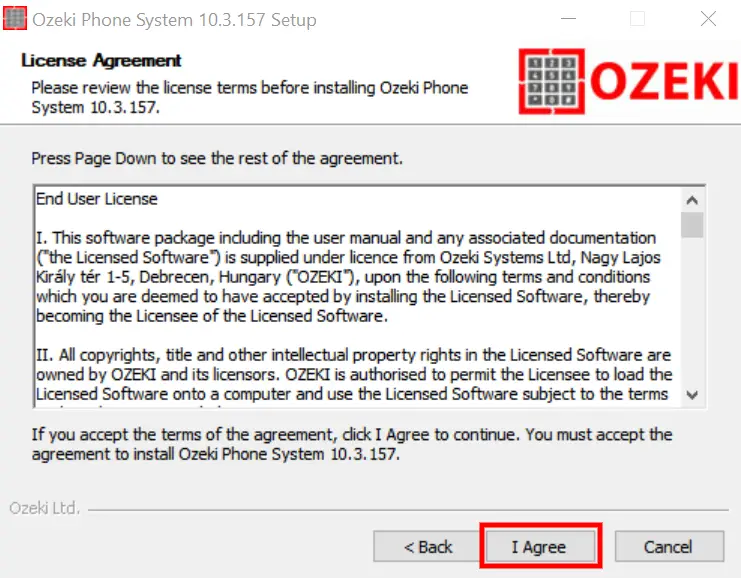
To have a legal copy of the program, you will need to accept the License Agreement of the program. Read it through and click the 'I Agree' button located under the License Agreement (Figure 4). This document will make sure that both you and Ozeki are protected from legal problems.
Installation process
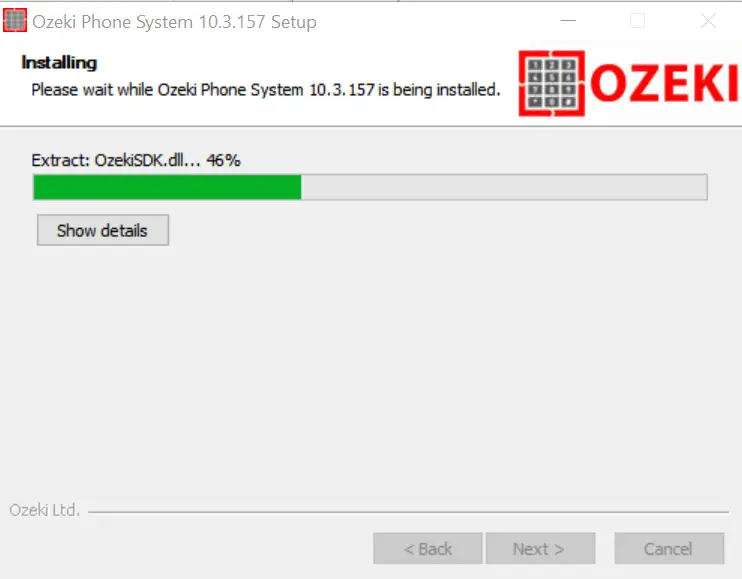
When you start the installation process, you will see an empty progress bar (Figure 5). During the installation process, you will see that is filling up. If it is filled, it means that the installer is finished, and you have a working copy of the software. There is no further action needed. Just wait for the installation to finish.
Finish the installation
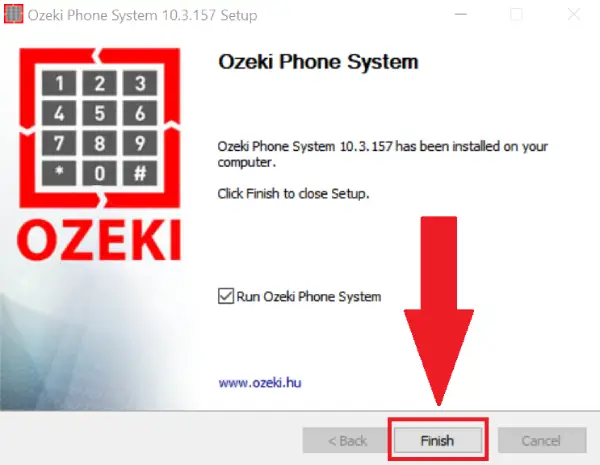
If you see this page, it means that the installer is finished. Tick in the checkbox before the 'Run Ozeki Phone System' setting. It will make sure that after the installer is closed, the Ozeki Phone System will start. Click the 'Finish' button to close the installer.
Ozeki Phone System started
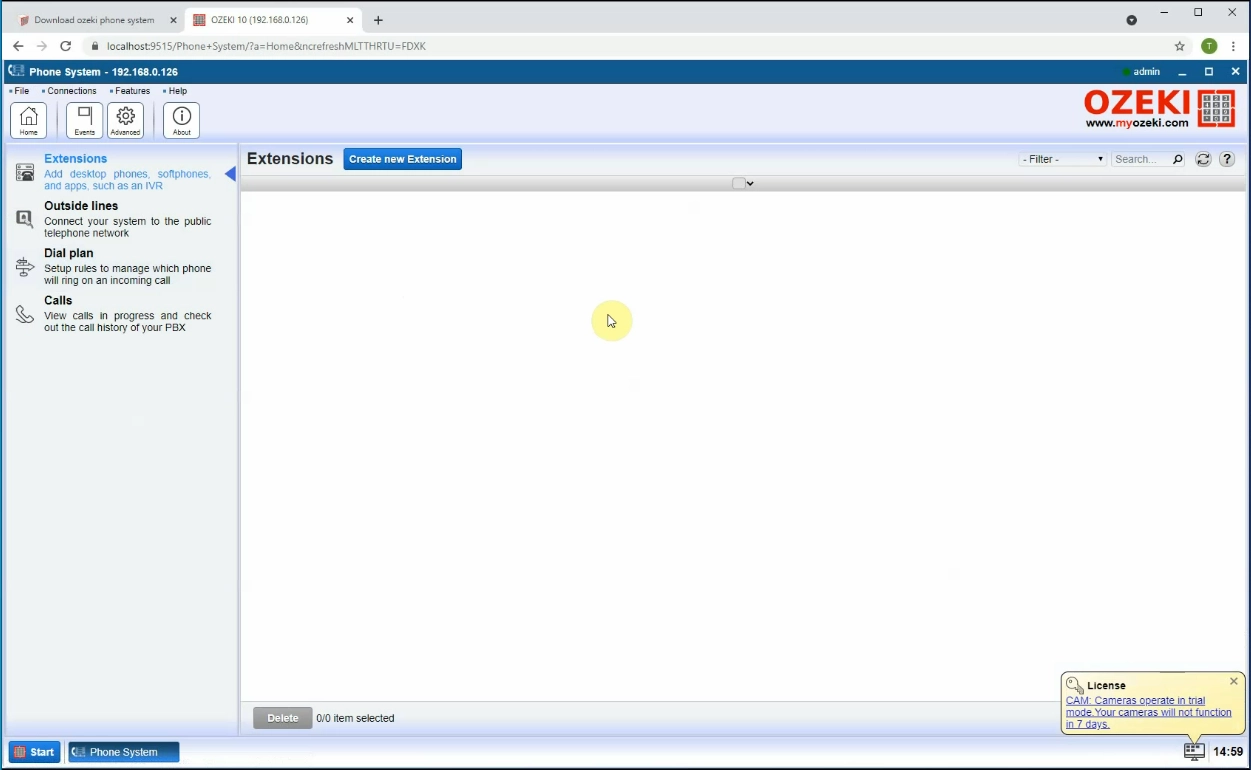
If you have started the Ozeki Phone System, you will see the welcome page of it (Figure 7). In this software, you can manage all your phone lines, create new ones or delete existing ones. You can watch logs of phone lines and handle errors easily.
Create Phone System extensions and make call
In the following video, we are going to show you how to create phone lines and how to make a call. The video will start with the home page of the Ozeki Phone System and will end with a successful phone call. It is a 1:43 long video that is very detailed and easy to understand. We did our best to make the process as easy as possible. We hope you have no problem with following it.
Create a new Extension
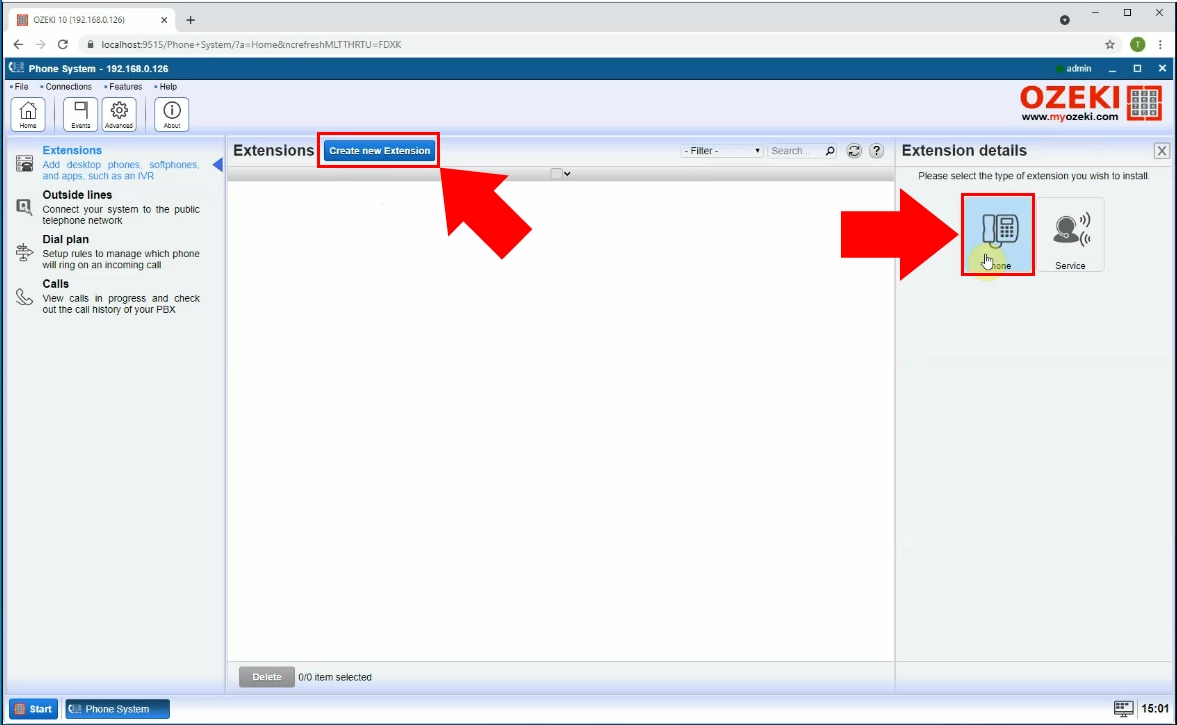
To have a working phone line, you need to create a new extension. To do so, click the 'Create new Extension' button located next to the title. Press it to open the 'Extension details' panel on the right side of the screen. There you will have two options. In our case, please choose the 'Phone' option (Figure 8).
Provide phone number and password
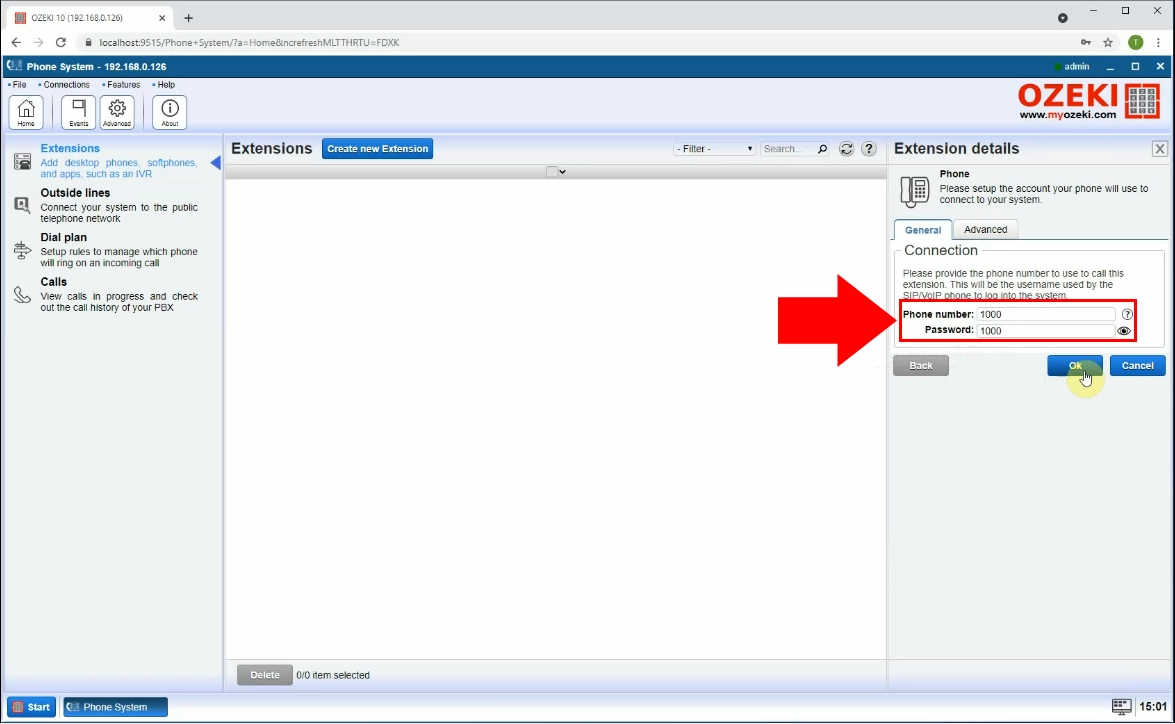
The next step is to configure the extension details. You need to give the phone line a 'Phone number' and a 'Password'. Make sure that the phone number is unique and the password is something that is easy to remember but hard to guess. If you are finished, click the 'Ok' button located under the 'Connection' group box (Figure 9).
Created extensions
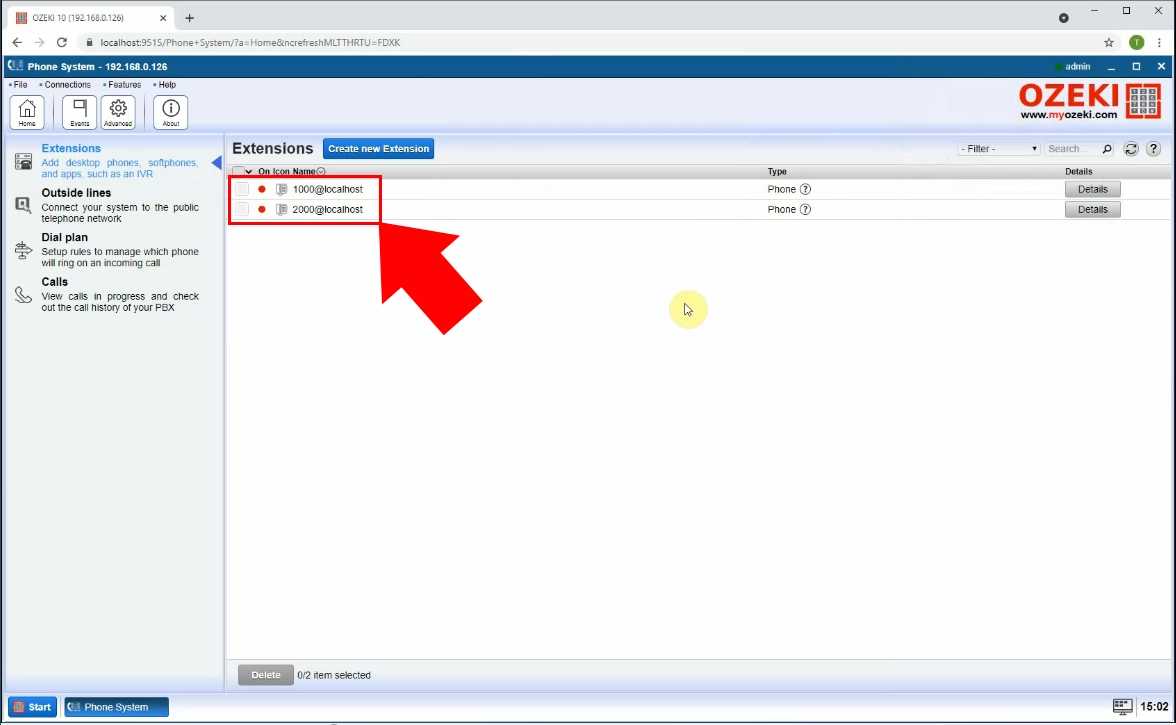
On Figure 10, you can see the list of all the existing phone lines (Figure 10). You can see that now there is a phone line named '1000' which was the example name before. Create another phone line named something different. In this example, it is named '2000'. This phone line will be used as the receiver of the phone call. You can now use these extensions as phone lines.
Register the phone line
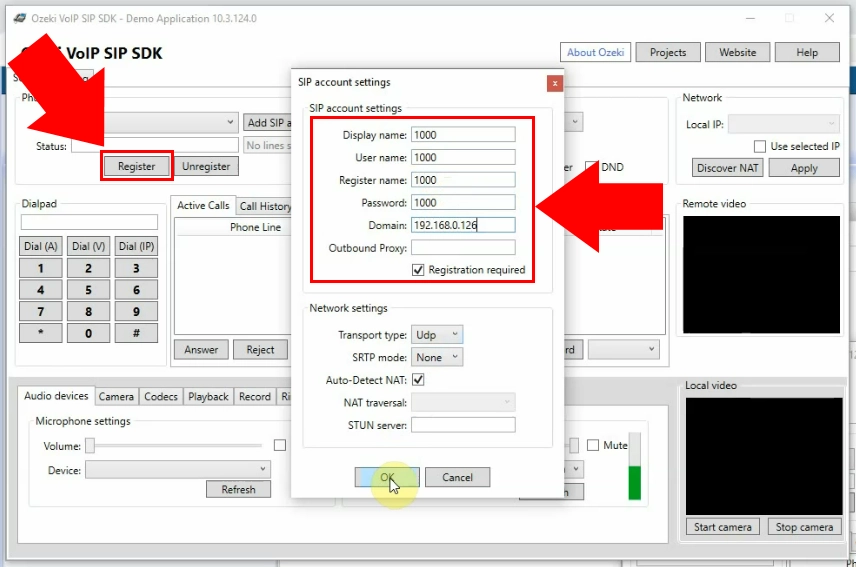
Now you need to register those phone lines in the Ozeki PBX application. Click the 'Register' button located under the Status textbox. After clicking it, you will see the SIP account settings panel. Provide all the information about the first phone line and click the 'Ok' button. It will register your phone line to the program. Repeat this step with the second extension as well. This way you can use both as phone lines.
Softphone connection is active
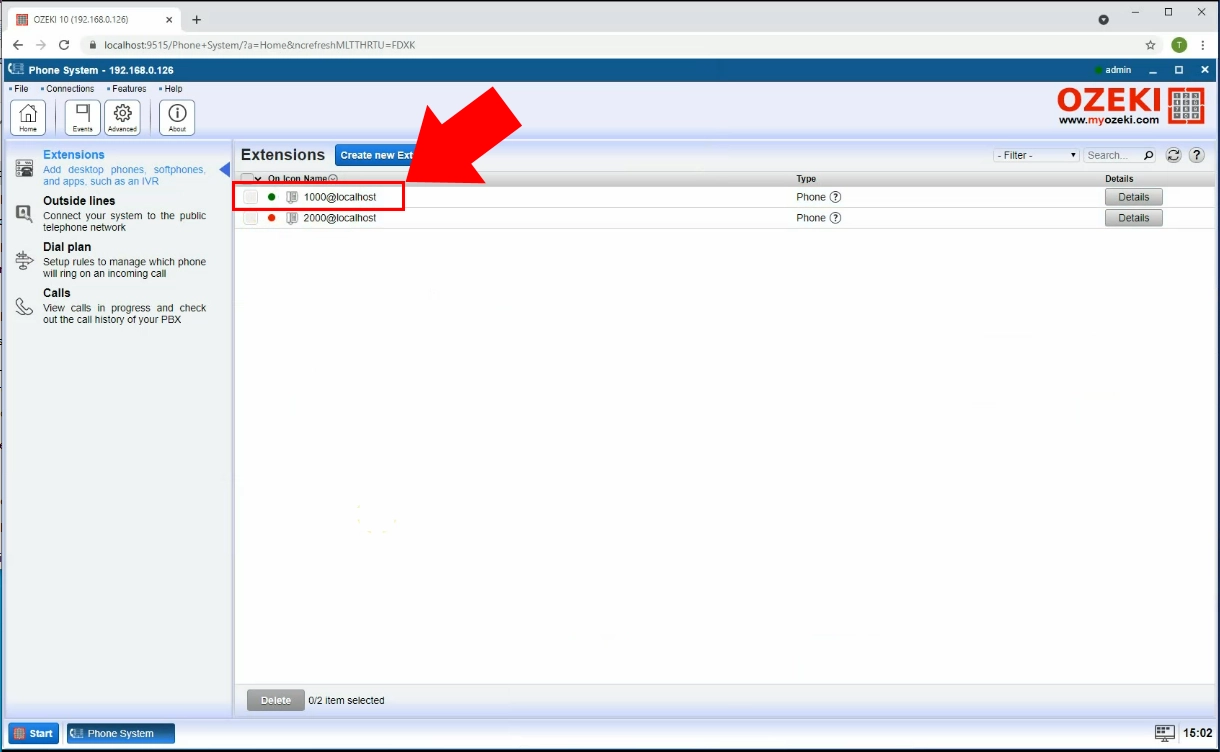
Head over to the list of the existing phone line. There you will find that the registered extension will be visible online (Figure 12). If the dot before the title of the extension is green, it means that the phone line is registered in PBX and the connection is active. If you see that the extension is active, you can start using it.
Successful call
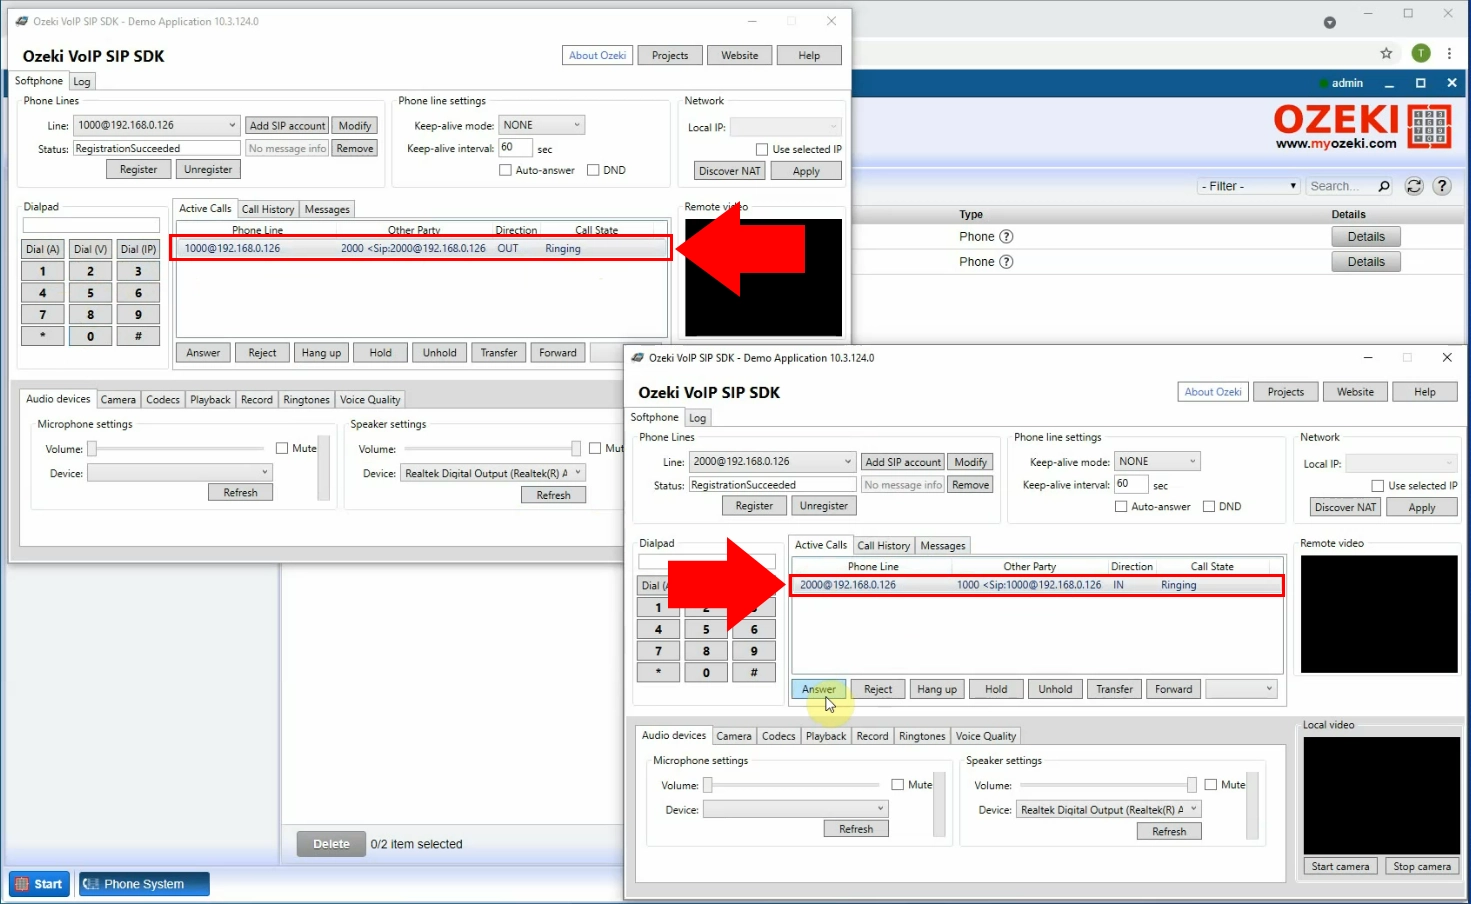
You can use the PBX application to start a call between the two connections. As you can see highlighted on Figure 13, you can see the incoming and outgoing calls in the active calls tab. Press the 'Answer' button to accept the incoming call and start talking. You can also complete your system with video capabilities.
Conclusion
By reading this article, you have learned how to set up Ozeki Phone System on your Windows PC. This was part one of two. Using the Ozeki Phone System will make communication in your organization way easier and more efficient because you can make phone calls from your computer.
More tutorials worth checking is available on the following links : System requirements of Ozeki Phone System and How to activate your Ozeki Phone System
Now your next thing to do is to download Ozeki SMS Gateway and configure this solution immediately! Everything is there to get it up and running in less than 10 minutes.
Part 2: Connect Ozeki Phone System to the telephone network
If you have any questions or need assistance, please contact us at info@ozekiphone.com
