How to setup system notification in Ozeki Phone System
Ozeki Phone System provides a System Notification feature, which can be useful if you are providing a 24/7 service and you need instant notification in case the state of an outside line or extension changes or when someone not authorized is attempting to login to the PBX. The article below describes how you can use this notification feature and what configurations are needed to set it up in Ozeki Phone System.
If you want your service to be running with the lowest number of errors and pauses then using the system notification feature of Ozeki Phone System is the key to this.
Step 1: How to add an email provider in Ozeki Phone System
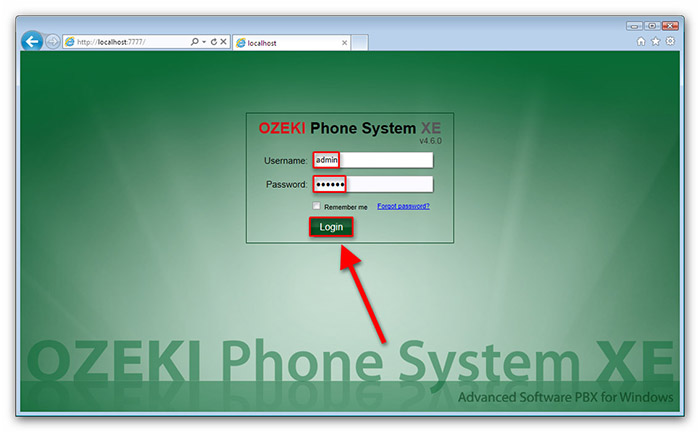
To setup the notification feature in PBX you have to create an email provider connection and a dial plan for messaging. To do so login to Ozeki Phone System (Figure 1). Type in your username and password then press login.
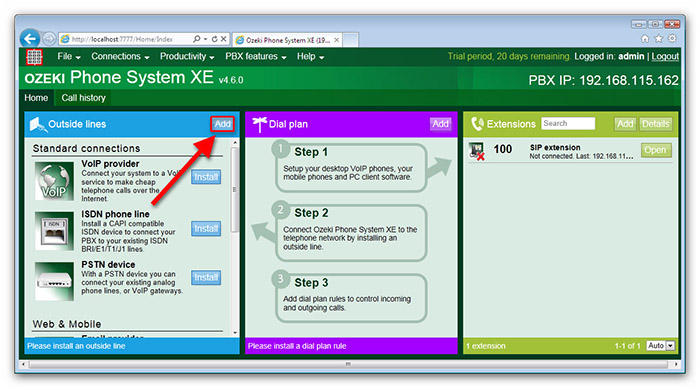
On the left side of the screen you will see a blue bordered box called Outside lines. Click ’Add’ (Figure 2). You need to install an Email provider. If a notification needs to be sent out in email, the PBX can forward it to the email provider to send it out to the set email address.
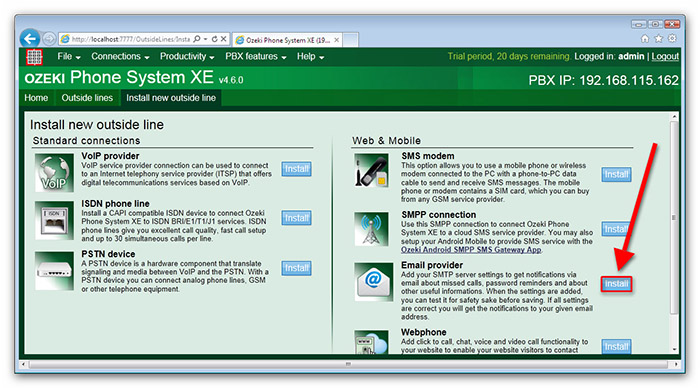
On the right half of the screen you will see an ’Email provider’ label. Click the ’Install’ button next to it (Figure 3).
How to configure the email provider in Ozeki Phone System
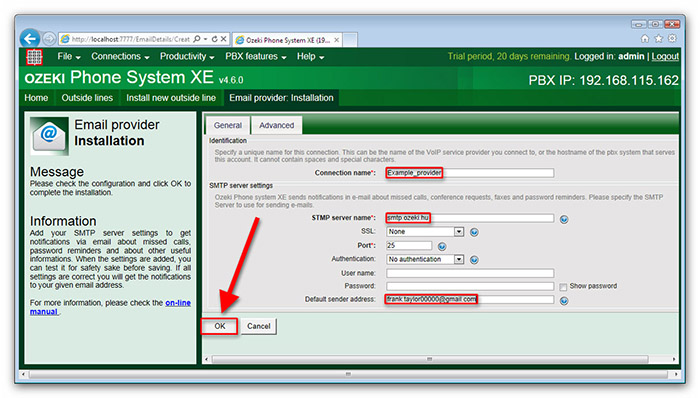
On the configuration panel of the new Email Provider, enter the name of this connection. After that you need to specify the SMTP server name, the Port number and an email address as a default sender address. In case of using traditional email services, like G-Mail, Yahoo, etc., you need to fill out the other edit boxes as well. For this information please ask your Email Service Provider. Having done these steps, click on the 'OK' button (Figure 4).
Step 2: How to add a dial plan rule to the email provider in Ozeki Phone System
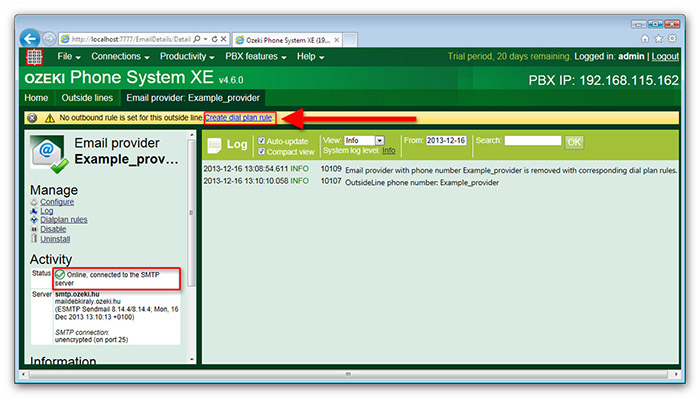
In the Activity menu panel, you will see that the SMTP connection is estabilished. Next you need to add a dial plan rule to the email provider. You will see a warning message after creating the email provider. Click on ’Create dial plan rule’ (Figure 5).
A dial plan needs to be created to determine which emails will be
forwarded to the email provider. After they are forwarded they will be
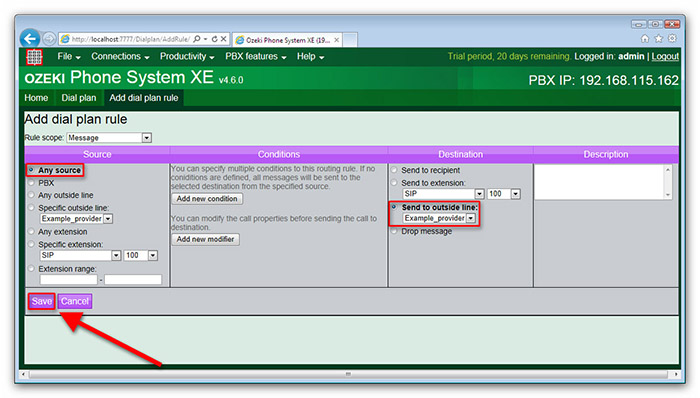
sent out. The Rule scope has to be set to ’Messages’ and the destination
has to be set to the email provider you have just created.
Then set the source to 'Any source'. This can be an extension or an
outside line. You can even specify a range of extensions.
If you’re ready setting up the dial plan click ’Save’ (Figure 6).
Step 3: How to setup the system notifications in Ozeki Phone System
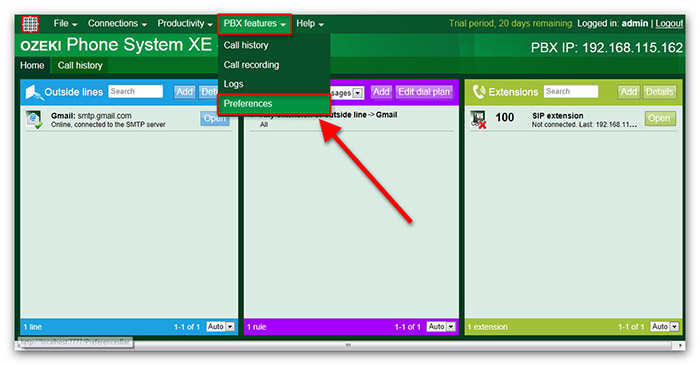
Now you can setup the system notifications, to do so move your mouse cursor to the PBX features on the top of the screen and click on Preferences (Figure 7).
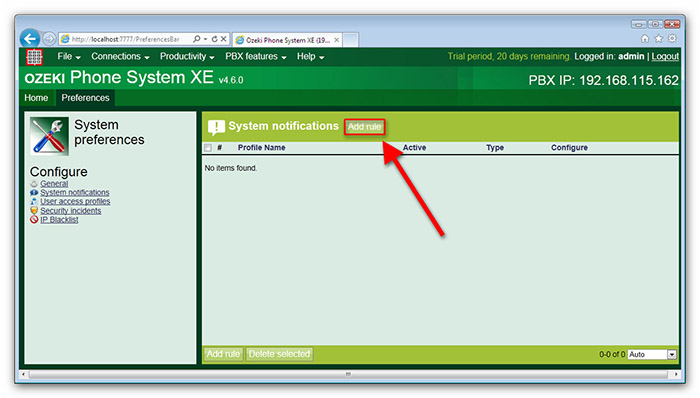
In the preferences window click on the System notifications on the left side of the screen and then click on Add rule (Figure 8).
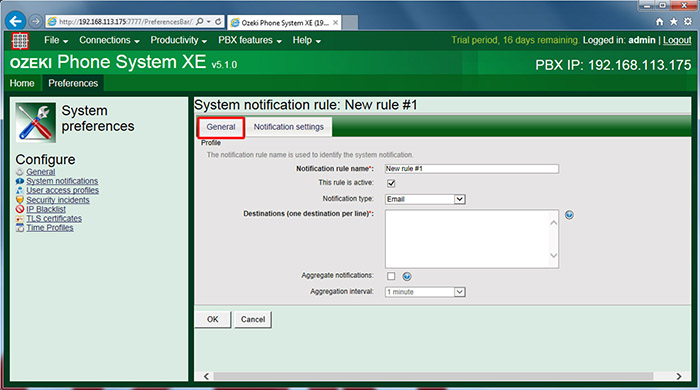
In the General tab you need to configure the following (Figure 9):
- Notification rule name: This is used to identify the system notification.
- This rule is active: This checkbox is used to enable or disable this system notification.
- Notification type: The type of notification can be e-mail, sms or call.
- Destinations (one destination per line): You have to provide e-mail address or telephone number, depending on the notification type.
- Aggregate notifications: If this checkbox is unchecked, the notifications will be send immediately. If it is checked, the notifications will be send based on the aggregation interval.
- Aggregation interval: If the aggregate notifications checkbox is checked, the notifications will be send together in every minutes/hours that you provided here.
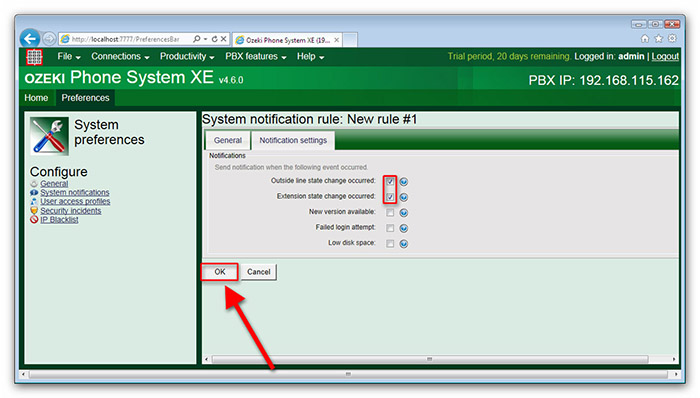
In the Notification settings tab you need to select the events about you want to be notified when they occur. You can select the following notifications (Figure 10):
- Outside line state change occurred: You will get this type of notification, if an outside line state change occurs. This means it goes to available or unreachable state.
- Extension state change occurred: You will get this type of notification, if an extension state change occurs. This means it goes to available or unreachable state.
- New version available: You will get this notification, if a new version is available from the Ozeki Phone System application.
- Failed login attempt: This notification will be send, when a failed login attempt occurs in the Ozeki Phone System application.
- Low disk space: This notification will be send, when the disk space is lower than 1024 MB. You will get more notification, if the free space is critical.
Step 4: How to test the notification feature
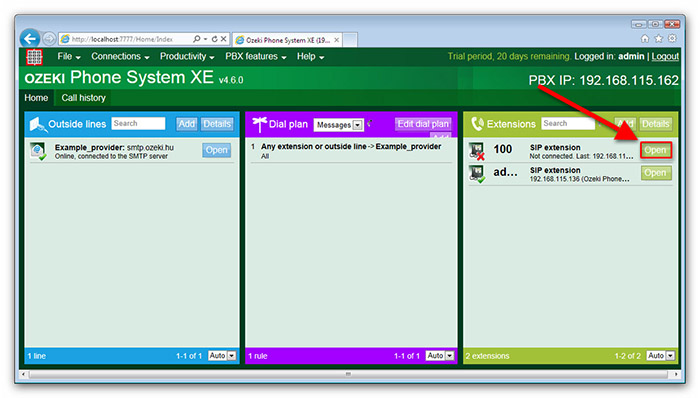
Trigger a notification event. In our case it is going to be the change in the sate of an extension. To manually change the state of an extension open it from the Extensions panel (Figure 11).
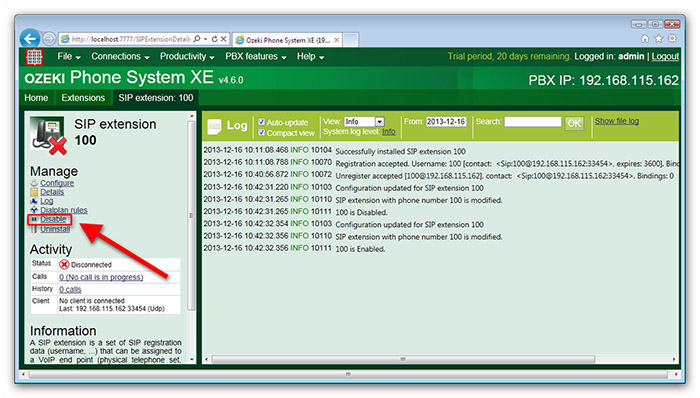
Click on Disable to change the state of the extension and then click on Enable to change it back to the state it was before (Figure 12).
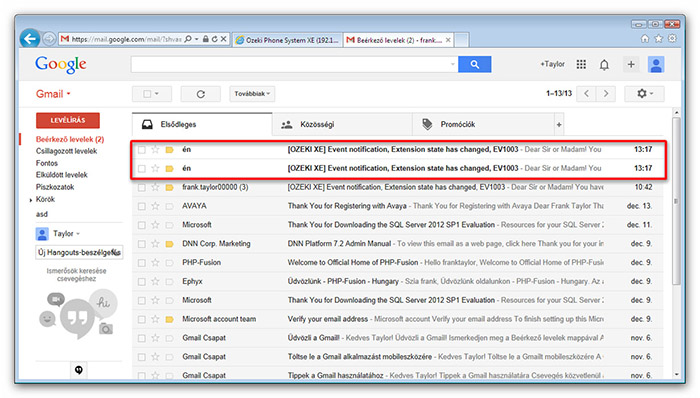
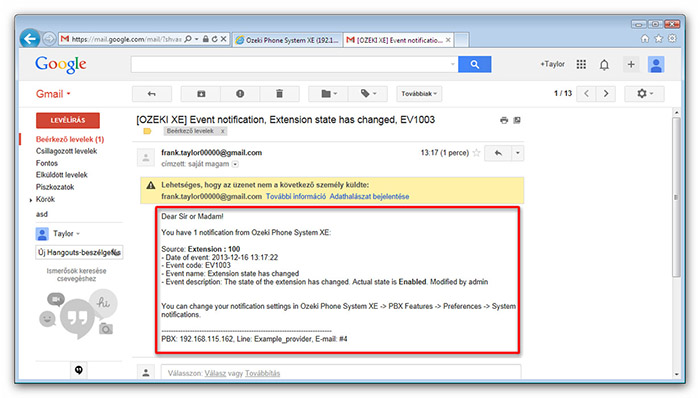
If you did everything correctly up till now you should have received two notifications to the email address you have setup previously (Figure 13)
If you have any questions or need assistance, please contact us at info@ozekiphone.com
Dig deeper!
People who read this also read...
- How to add mobile extensions to Ozeki Phone System
- How to create VoIP, ISDN or PSTN phone line connection
- How to connect SMS services to Ozeki Phone System
- Everything about Webphone Technology - Live chat, voice calls, video calls, click to call
More information
- How to setup call recording in Ozeki Phone System
- How to setup voicemail service in Ozeki Phone System PBX
- How to setup e-mail messaging in Ozeki Phone System PBX
- How to setup an echo/sound test in Ozeki Phone System PBX
- How to provide an SMS Service to your customers
- How to select the language of text-to-speech feature
- How to create a dialer extension on Ozeki Phone System PBX
- System notifications
- How to manage office users in Ozkei Phone System
- Addressbook

 Sign in