How to setup Ozeki VoIP Click to Call
Ozeki VoIP Click to Call plugin
Use your Mozilla Firefox browser with Ozeki VoIP Click to Call plugin to call a PSTN phone number from a website with only clicking on the highlighted telephone number. With this plugin you will be able to make call from a website through the Ozeki Phone System PBX. This step-by-step guide explains you how to setup and configure it.
Prerequisites
- Ozeki Phone System
- Mozilla Firefox web browser
- Ozeki VoIP Click to Call plugin
How to install
This section of the guide focuses on how to install the Ozeki VoIP Click to Call plugin. There are two methods of the installation. You can install it directly from the Mozilla Firefox addon website. Or you can download file from our website and install it.
Installing from the Mozilla Firefox Add-ons web page
First open your Mozilla Firefox browser and load the following website to install the Ozeki VoIP Click to Call Plugin.
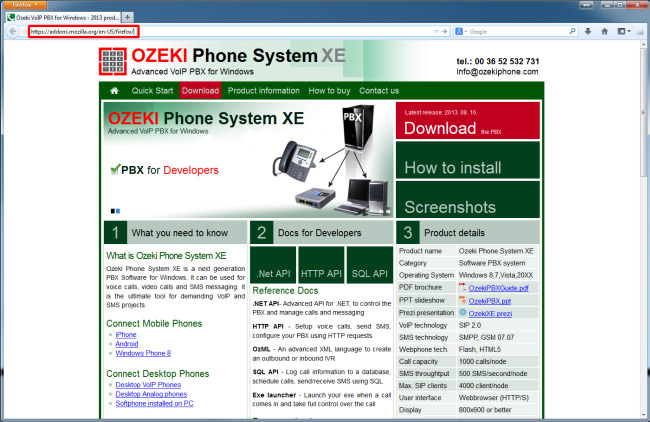
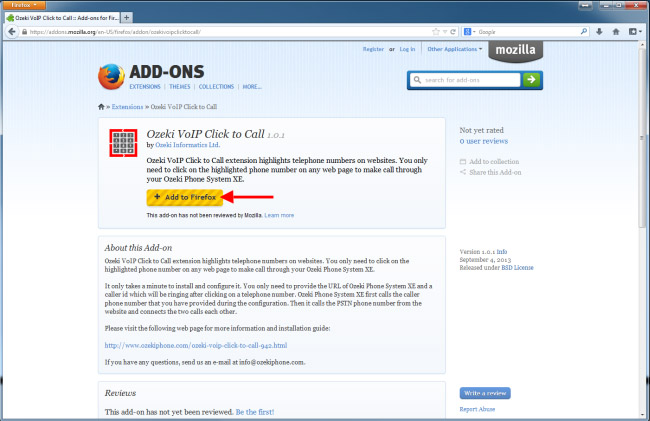
On the next page click on Add to Firefox button to install the extension.
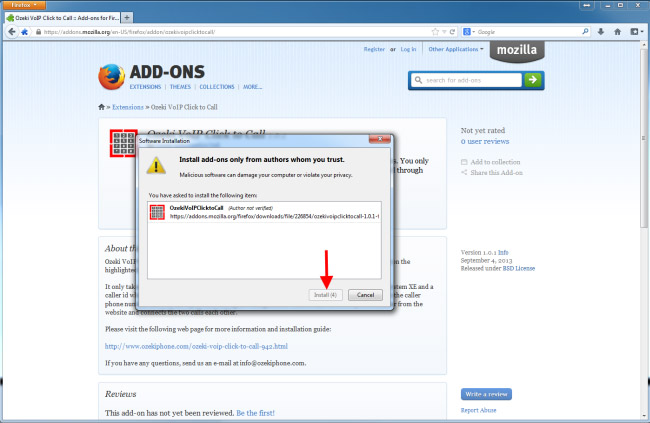
On the popup window click on Install button to install the extension, and then restart your Mozilla Firefox Web Browser.
Installing from file
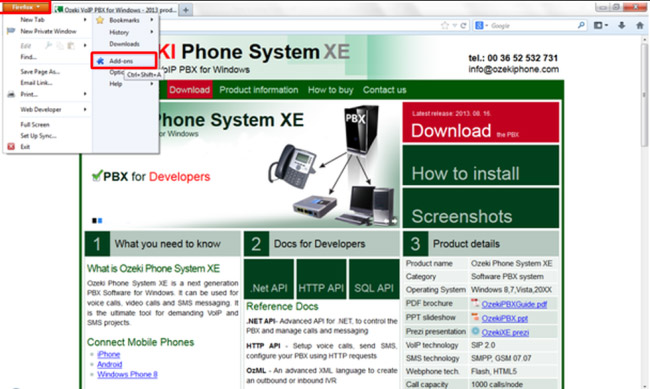
First, click on the Firefox button at the top left hand corner of the window, then choose the Add-on button.
On the next page find the ”Tools for all add-ons” button, click on it and then choose the "Install Add-on From File" button.
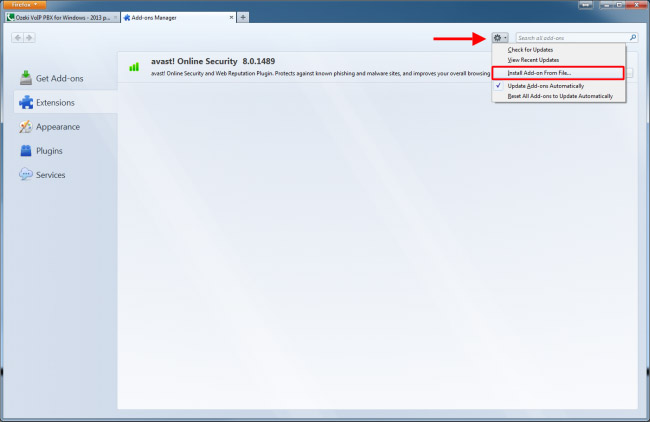
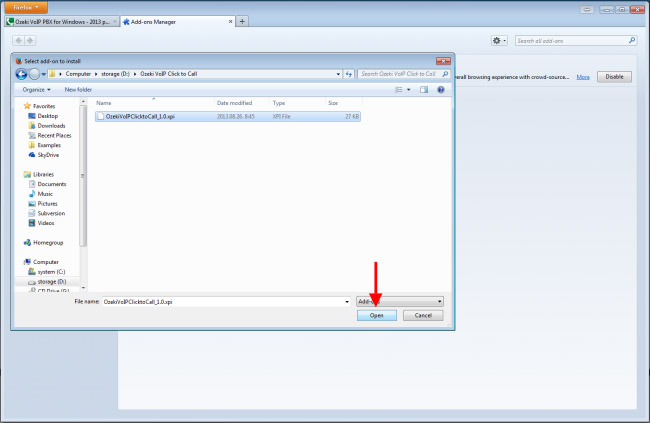
On the popup window find and select the file and click on Open button.
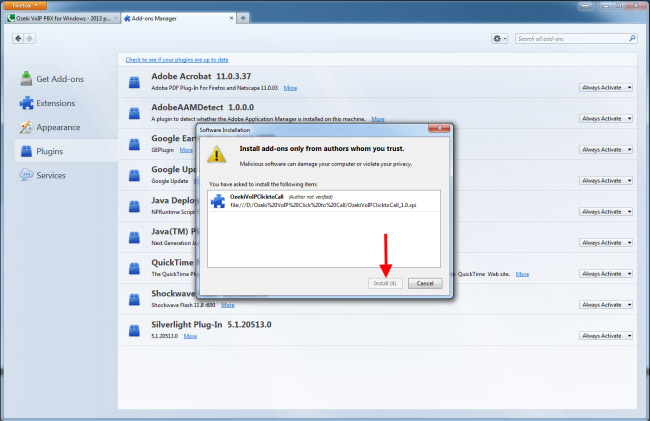
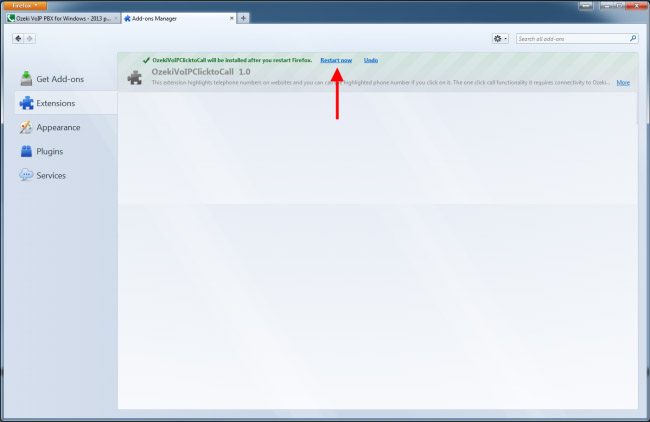
The following window ask you to click on "Install" and then "Restart now" buttons in order to finish the installation process.
On the following figure you can see where to click in order to finish the installation.
How to configure
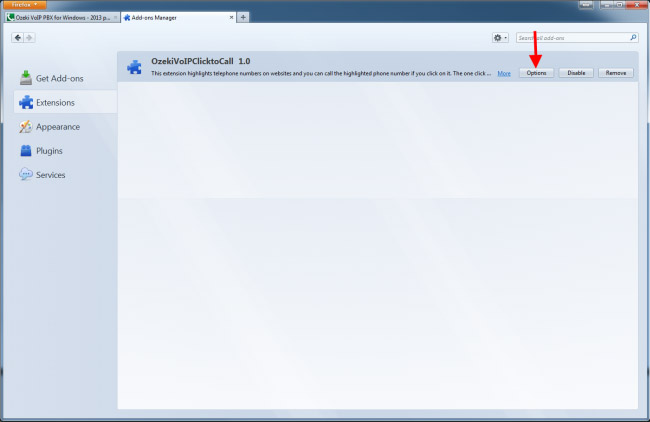
After the installation process, let’s see how to configure the Ozeki VoIP Click to Call plugin. Under the Add-ons Manager of the Mozilla Firefox, select the Extensions menu, click on the Ozeki VoIP Click to Call and then choose the Options menu.
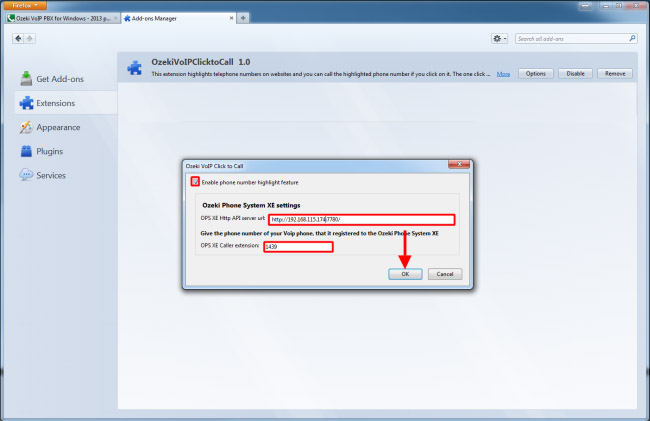
Here you need to provide the URL of your Ozeki Phone System and the port number where it is listening to HTTP Requests. In the second textbox you need to give a telephone number which will be ringing after somebody has clicked on the icon which belongs to the Ozeki VoIP Click to Call plugin.
How to use
In this section you can see an example which describes how you can use the plugin. On the following figure you can see an icon that is placed next to the telephone numbers. If the phone number starts with 00 or +, the Ozeki VoIP Click to Call plugin puts the logo of Ozeki Phone System before the phone number.
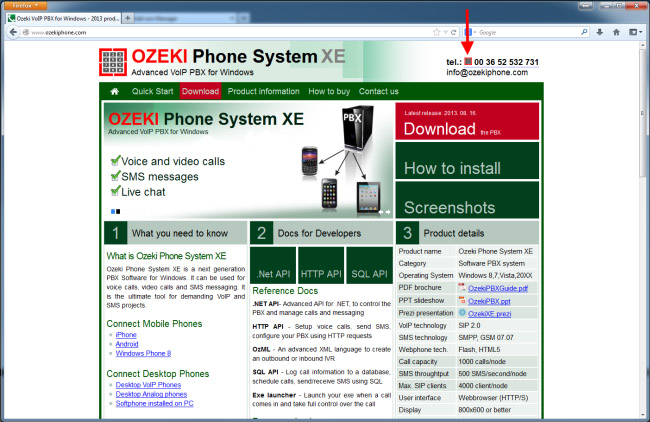
Clicking on the icon of the Ozeki VoIP Click to Call or the phone number, the plugin first calls the caller phone number and then the telephone number on which you have clicked.
How does it work
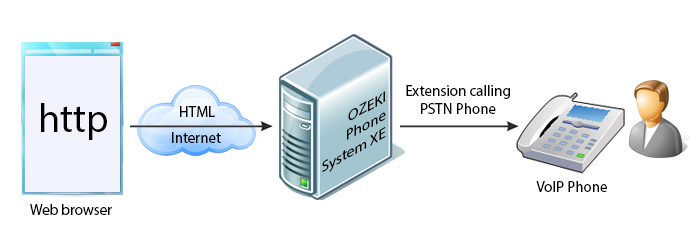
The following figure shows how the Ozeki VoIP Click to Call plugin works. In a web browser by clicking on the logo or phone number, the plugin sends an HTTP Request to Ozeki Phone System, which have been set previously on the configuration form of the plugin. The HTTP Request contains the caller and callee telephone numbers. Ozeki Phone System first calls the caller phone number and then the phone number from the website.
If you need any assistance, please send us an e-mail at info@ozekiphone.com.
- How to connect your Desktop VoIP Phone to the Ozeki Phone System
- How to connect your softphone to Ozeki Phone System
- How to connect to VoIP service providers
- How to connect Websites and Telephones by using the Ozeki Phone System
- How to setup Call routing
More information
- How to setup Ozeki VoIP Click to Call Mozilla Firefox add-on
- How to make 3D video calls with Ozeki XD Phone softphone
- Ozeki VoIP Service Checker tool for checking VoIP service availability
- How to create callback functionality in Java into your Android application

 Sign in