
 Sign in
 How to use the Database Addressbook Provider in Ozeki Phone System
The database addressbook provider enables you to integrate your existing contact database with Ozeki Phone System. In this guide, you will see how to install and configure the Database Addressbook Provider in Ozeki Phone System.
First of all login to the Ozeki Phone System using your username and password (Figure 1).

Select PBX Features and then Addressbook menu (Figure 2).

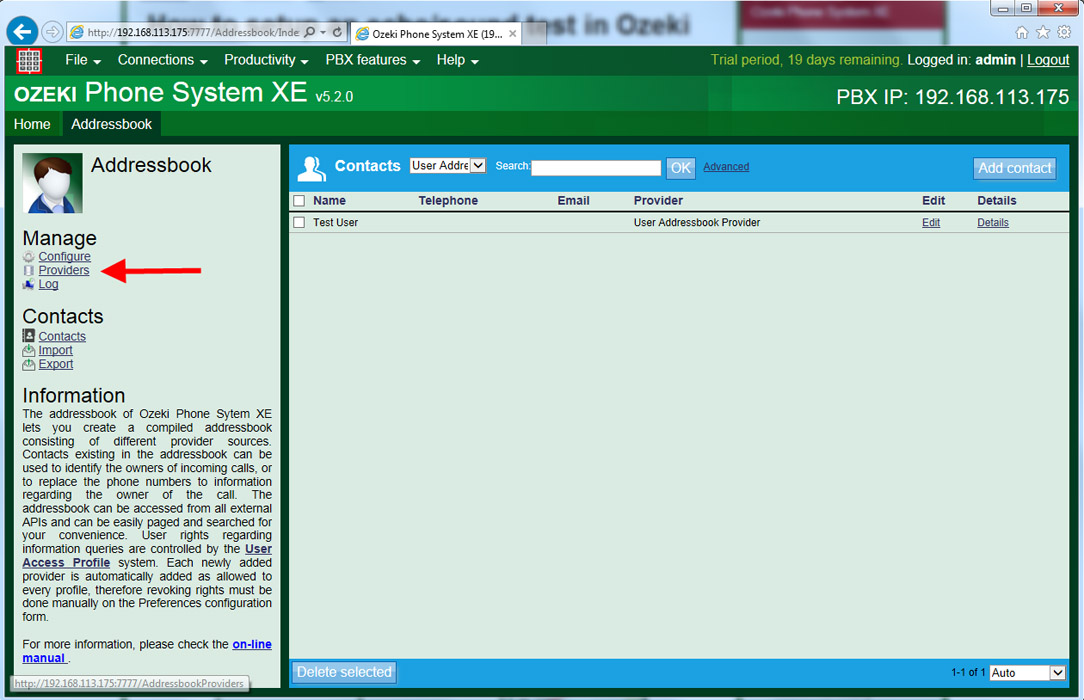
On this page, you can query the contacts of your Addressbook providers. To install a Database Addressbook Provider, click on Providers button in the left menu (Figure 3).
On this page, you can see the list of your providers. By default, the User Addressbook Provider and Local Addressbook Provider cannot be deleted. If you wish to use your existing contacts in your database server, click on Add provider button (Figure 4).

Here, you can see what kind of addressbook providers can be installed. You need to click on Install button belonging to Database addressbook provider. By default, each newly added provider is automatically added as allowed to every profile. It can be modified manually under the configuration page of User Access Profile (Figure 5).

Figure 6 shows how to connect your PBX to your database server. Under the Database connection tab you need to give a Provider name and database connection information for connecting to your database. Here, you can find further information related to different database servers.

Under the Template tab, you need to provide a template will be used to query the proper columns of the addressbook database. Please make sure that you provide the columns which the addressbook provider supports.
The following column names are supported: FirstName, LastName, Company, Extra, BusinessTel, HomeTel, OtherTel, MobileTel, Fax, BusinessEmail, HomeEmail, OtherEmail, BusinessAddress, HomeAddress, OtherAddress.
If your database table has different columns, you need to write the SQL SELECT query in the following way:
Create table script for MySQL:
CREATE TABLE IF NOT EXISTS `ozpbxdbprovider` (
  `id` int(11) NOT NULL AUTO_INCREMENT,
  `FirstName` varchar(300) DEFAULT NULL,
  `LastName` varchar(300) DEFAULT NULL,
  `Company` varchar(300) DEFAULT NULL,
  `Extra` varchar(300) DEFAULT NULL,
  `BusinessTel` varchar(300) DEFAULT NULL,
  `HomeTel` varchar(300) DEFAULT NULL,
  `OtherTel` varchar(300) DEFAULT NULL,
  `MobileTel` varchar(300) DEFAULT NULL,
  `Fax` varchar(300) DEFAULT NULL,
  `BusinessEmail` varchar(300) DEFAULT NULL,
  `HomeEmail` varchar(300) DEFAULT NULL,
  `OtherEmail` varchar(300) DEFAULT NULL,
  `BusinessAddress` varchar(300) DEFAULT NULL,
  `HomeAddress` varchar(300) DEFAULT NULL,
  `OtherAddress` varchar(300) DEFAULT NULL,
  PRIMARY KEY (`id`)
) ENGINE=InnoDB DEFAULT CHARSET=latin1 AUTO_INCREMENT=1 ;

On the next page, you can see the newly installed Database addressbook provider in the list of the providers. Clicking on the Configure button, you can make changes in the settings of this provider (Figure 8).

You can query the contacts of the addresbook providers by clicking on the Contacts menu. On the top of the page, you need to select the addressbook provider that you would like to see (Figure 9).

Under the Configure menu, you can set the following:
- Call history Integration: If this option is enabled, Ozeki Phone System XE will display the detailed contact information for call history entries in the call history.
- Dial plan integration: If this option is enabled, Ozeki Phone System XE will replace the caller ID with the pattern specified during call routing.
In the Caller ID pattern textbox you need to provide the parameter name to be replaced with the caller ID (Figure 10).
The following parameters can be used here: $FirstName, $LastName, $Company, $Extra, $BusinessTel, $HomeTel, $OtherTel, $MobileTel, $Fax, $BusinessEmail, $HomeEmail, $OtherEmail, $BusinessAddress, $HomeAddress, $OtherAddress, $FullName, $PhoneNumber, $Email.

If you have any questions or need assistance, please contact us at info@ozekiphone.com
Dig deeper!
People who read this also read...
- How to select contacts from your Database
- How to add new contacts in your PBX
- How to use the contacts of your Activedirectory
More information
- How to setup Local Addressbook Provider
- How to setup User Addressbook Provider
- How to setup database addressbook provider
- How to setup HTTP Addressbook Provider
- How to setup LDAP Addressbook Provider