How to setup call routing for Inbound calls
Ozeki Phone System offers professional technology for managing incoming calls efficiently. If the call is initiated from an outside line and aimed at a device inside your network, it is called "Inbound call". Availability is one of the most important factor for a company, this way, it is critical to ensure that customers or business partners can reach you anytime. The ideal solution for this purpose is a first-rate communication system based on Ozeki Phone System.
This guide will focus on giving you a better understanding on Inbound call routing by implementing one in Ozeki Phone System. This will be achieved by connecting Ozeki Phone System XE to a PSTN Device (Public Switched Telephone Network) through a PSTN Device Extension (but you could use any Outside lines for this purpose). At the end, you will make dial plans and test them, but to be able to do that, you have to setup SIP extensions in both Ozeki Phone System, and the PSTN Device.
|
Step 1: Installing outside lines and extensions Step 2: Making a dial plan Step 3: Making a test call |
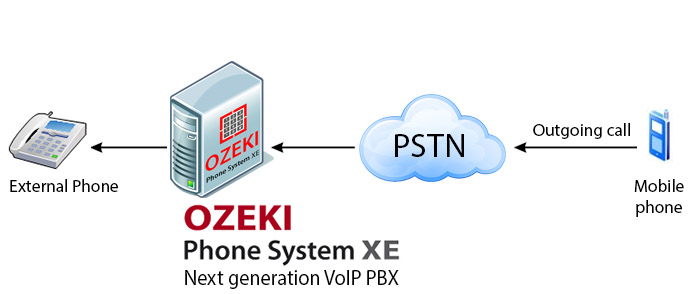
In order to keep up with competitors, organizations need to ensure reliable availability (often 24/7). Continuous availability requires a modern and powerful telephone system that is able to meet requirements of customers, partners and employees; while it needs to be able to take over the basic tasks from operators to enhance work flow. It means that the corporate PBX needs to ensure a very efficient incoming call management with effective call routing rules that allows automated call management.
Each employee needs an extension registered into the PBX, so the incoming calls can be directly forwarded to the extension(s) of the intended person. Advanced PBXs like Ozeki Phone System allows to register analog phones, cell phones, IP phones, softphones, webphones etc. into the telephone system in order to ensure an extremely efficient communication system with outstanding services.
If you have connected all of the extensions, and you set up your corporate telephone system, you are ready to synchronize the registered extensions: with the help of Ozeki Phone System, this procedure takes only a few seconds. You can easily specify tasks to be executed by different extensions in specific cases.
Configuration optionsYou can configure Ozeki Phone System to execute various tasks based on corporate requirements in case there is an incoming call:
-
Status related call forwarding: you can set in the graphical user interface how extensions should handle incoming calls in different statuses: so if the status of the given extension is "available", then the call is accepted. However, if the status is "busy" or "not available", the call can be placed on hold or forwarded to another extension (even within a ring group), etc.
-
Caller related call forwarding: it is possible to set some phone numbers not to ring on one or more given extensions. You can easily configure the server to forward these incoming calls to another extension or ring group; or to return a "busy", "not available" or other notification to the caller
Of course, you can set these phone numbers to be always forwarded to the given extension(s) or ring group. You can use this feature in case of incoming and internal calls, as well: by using these features, you can restrict or allow the free use of extensions for your employees.
-
Automatic call forwarding: if you have an extension that you do not use for a while (because of, e.g. disease, holiday or other reasons), you can forward all incoming calls to another extension or another ring group.
-
Automatic call forwarding, using IVR: if you use IVR (Interactive Voice Response), incoming calls can be forwarded automatically to the extension that has been selected by the caller in the voice menu, with the keypad.
Step 1: Installing outside lines and extensions
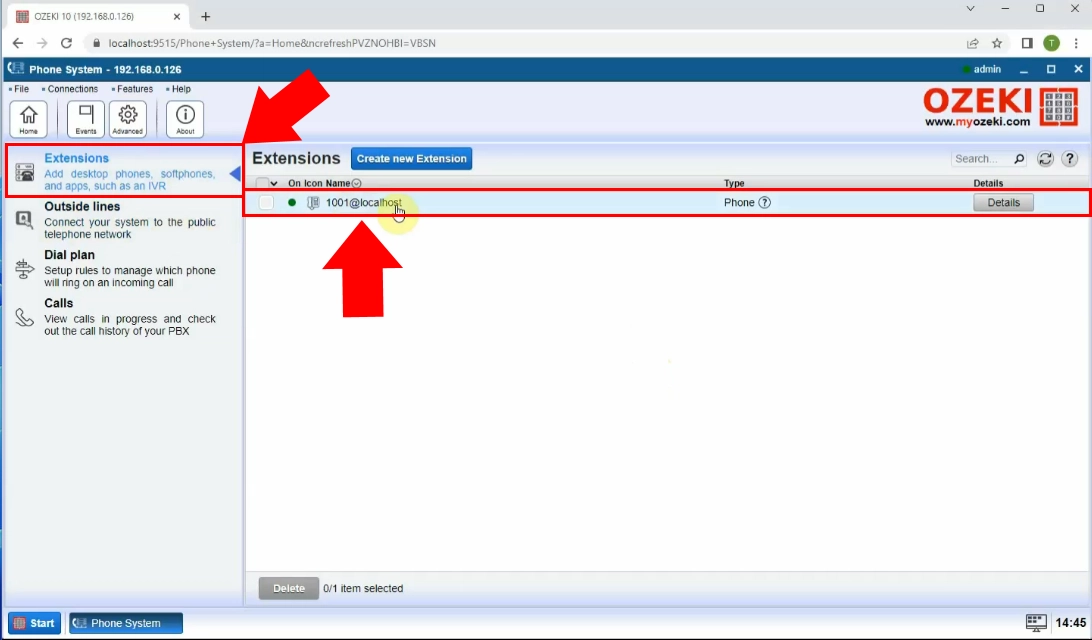
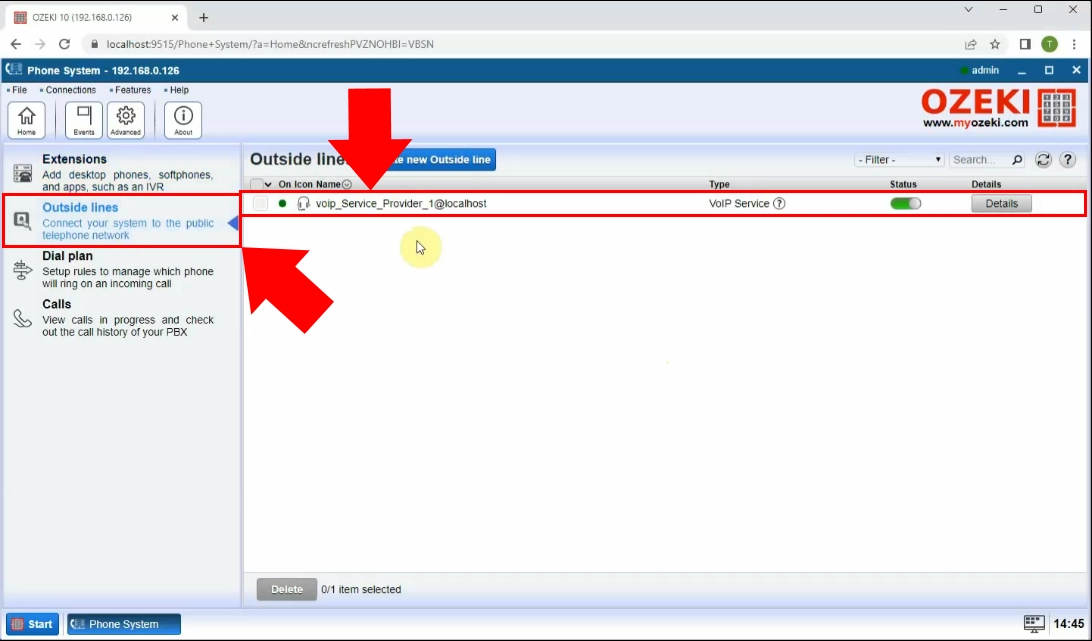
Now, it is assumed that you have already added extensions to Ozeki Phone System XE, and that you configured your PSTN Device with its own extensions.
Step 2: Making a dial plan
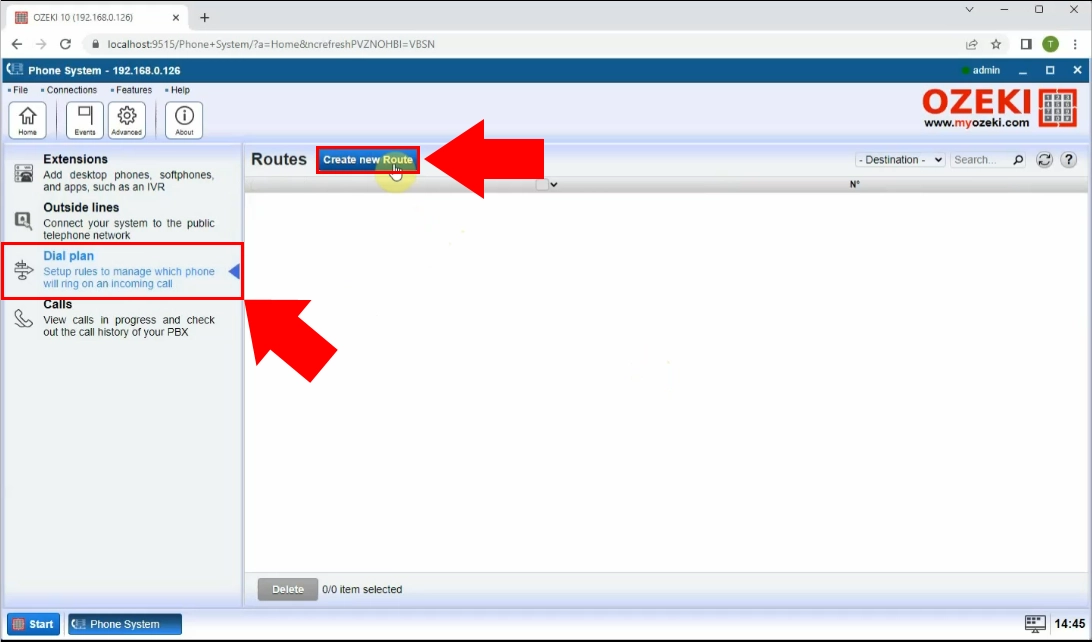
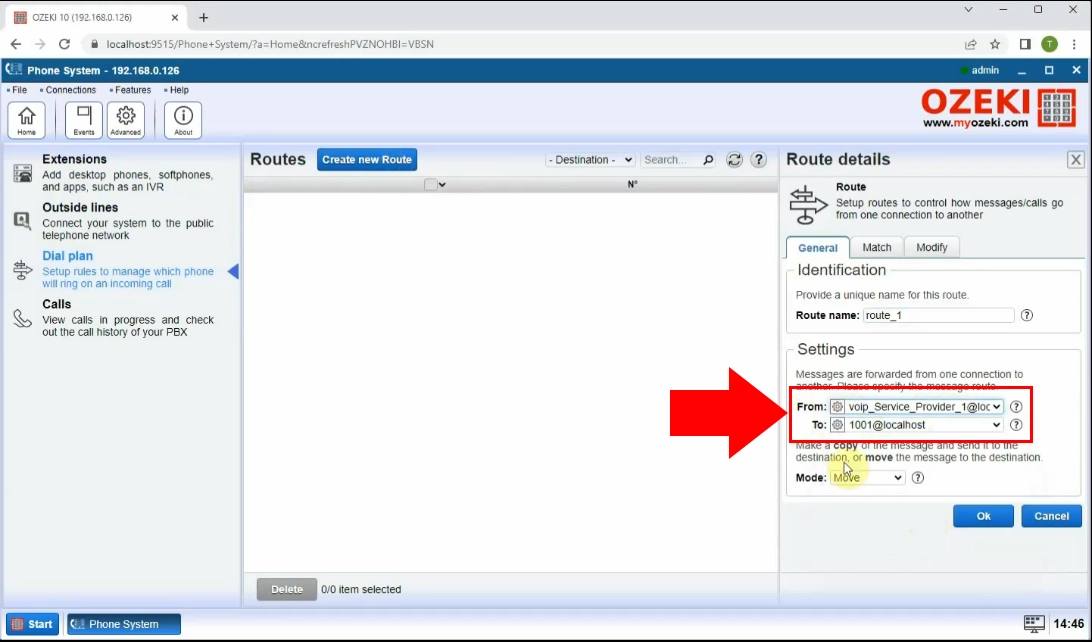
You are going to make dial plans for inbound calls. In order to do that, navigate to the main page of Ozeki Phone System, and click on the Add button at the Dial plan section (Figure 4).
About the Inbound Dial plans:
You can see four columns (as Figure 4 shows below):
-
1. Source: the source of the call. You can select one of the options with a radio button:
-
2. Conditions: here, you can set the routing rules (which are selecting the calls to be sent) and the call properties
(which are manipulating the selected attributes).
You can add more entries to the call conditions and properties, and the operating of these modifiers will happen in the order of the adding. There is AND connection between the entries, so the call will be sent to the destination only if it suits all of them.
About the attributes, usable within this scope:- Dialed Number: the called phone number.
- Caller ID: the phone number of the caller.
- Caller display: the identification what you see on your phone device when you have an inbound call.
- Time profile: you can set a schedule for your users as Time profiles.
Routing rule conditions:
The call will be sent from the source to the destination, if all of the set conditions suits the selected attributes. You can define conditions for the Dialed number, the Caller ID and the Caller display attributes with the followings:- You can also set the routing rule to send calls only from particular Time profiles.
Call properties:
If there is a call which has passed all the set conditions, it can still contain the extra characters for the purpose to indicate something to the dial plans. Since you will not need those anymore, before the PBX sends the call to the destination, it can make preprocessings on the Dialed number, Caller ID, Caller display attributes:
As the next step, select:
- Inbound calls from the Rule scope list, since this guide is focusing on the call routing of Inbound calls.
- Specific outside line at the Source section, because we want to manage Inbound calls from a PSTN Device outside line. (In this guide its added as a PSTN Device, and its number is "11000")
- Send to extension specified by the dialed number, at the Destination section. It simply sends the call to the dialed number.
- Do not modify anything within the Conditions and the Other columns.
You can check the examples chapter for more information about setting up conditions.
After you have done the configuration (Figure 5), just click on the Save button.
Step 3: Making a test call
In order to make a test call, the PSTN Device (number "11000") will dial a SIP Extension of Ozeki Phone System (number "1001"). You can find information about the test call from the log of the SIP Extension in Ozeki Phone System.
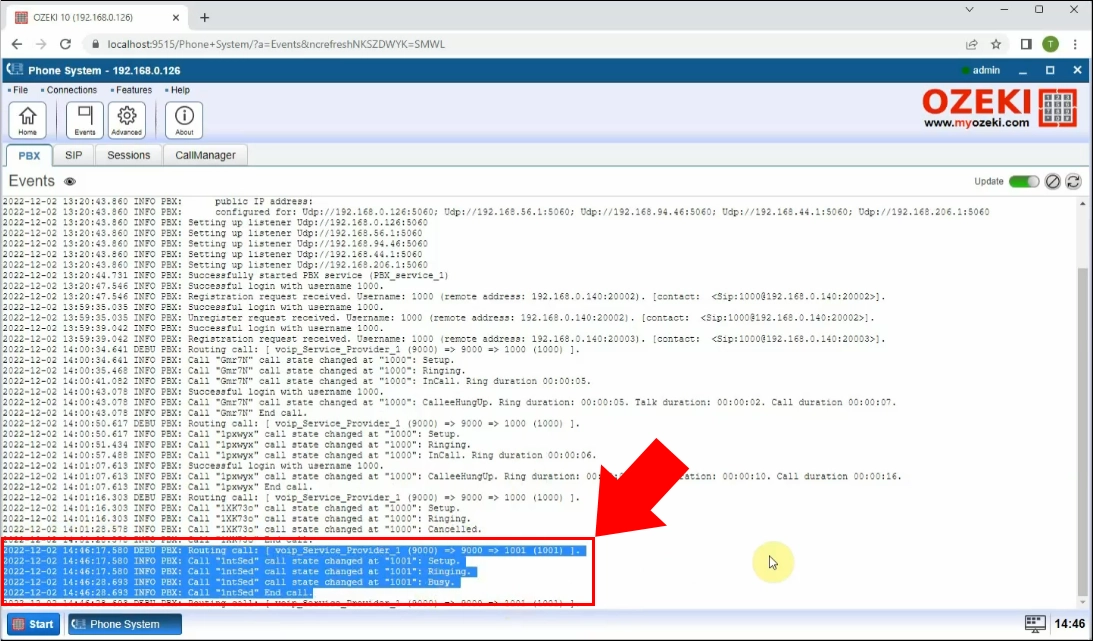
As Figure 6 shows, you can see the Incoming call received message, which indicates that the call was initiated from the PSTN Device, and was aimed at the destination extension of Ozeki Phone System. The call was succesful and the dial plan did its job.
Dial plan setup examples
If you would like to manage calls which would come from outside lines, you need to indicate it's
way to Ozeki Phone System with dial plans.
Outside lines can have more phone numbers, and the call from them will arrive to the PBX first, which sends
that to the selected local destination by the routing rules.
To manage these calls, you can set several conditions, for example:
-
Starts with: a common situation, when you would like to send
incoming calls from outside networks to IVRs (Interactive Voice Response), which are
using the caller's language. The Caller ID attribute always starts with the caller's country's prefix
(for example: phone numbers in the United Kingdom begin with the "+44" prefix).
If you would like to send the calls from the United Kingdom to an IVR, which is using the english language, you need to set the starts with condition with "+44" as parameter to the Caller ID attribute, and to set the correct IVR as destination. -
Equals: if your company has got more phone numbers, you can set which extensions should be reached, when
those numbers are being called. To do this, if the inbound call's Dialed number Equals to one of your
company's phone number, you can set which extensions should be reached, within the Destination column.
Another example; if you are the head of a company, you can set other companies' heads' calls to come directly to you. To do this, you just have to select the correct Caller ID attribute with the help of the Equals condition, and to set your own phone number as the destination. This way, these calls will be selected and sent directly to your given phone number, by the PBX. - Matches regex: to achieve the same goal as you did with the "+44" prefix (see above), you can set the "^+44\d+" regex, and select the Caller ID attribute. The "^" character indicates the beginning of the pattern, the "+44" is a fix number (the country's prefix), which should be followed by digits ("\d+"), where the "+" character indicates that, there should be one or more of them. The only thing left is to set the correct destination.
Conclusion
The guide above gave you a better understanding of the call routing of Inbound calls using the dial plans of Ozeki Phone System. If you follow the instructions step-by-step, you can easily set up a dial plan for Inbound calls, and test it with SIP extensions.
If you have any questions or need assistance, please contact us at info@ozekiphone.com
Dig deeper!
People who read this also read...
- Call recording basics
- How to add mobile extensions to Ozeki Phone System
- How to create VoIP, ISDN or PSTN phone line connection
- How to connect SMS services to Ozeki Phone System
- Everything about Webphone Technology - Live chat, voice calls, video calls, click to call
More information
- How to setup call routing for Inbound calls in Ozeki Phone System PBX
- How to setup call routing for Outbound calls in Ozeki Phone System PBX
- How to setup call routing for Missed calls in Ozeki Phone System PBX
- How to setup call routing for Messages in Ozeki Phone System PBX
- How to create time profiles and assign them to dial plan rules

 Sign in