How to manage office users in Ozeki Phone System
There are different users with different rights in Ozeki Phone System that can access the PBX from its GUI or through an API. Let's see how you can add and configure these users.
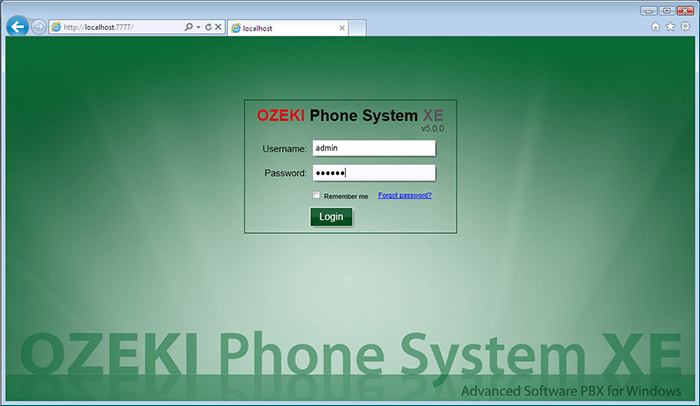
First of all login to your Ozeki Phone System with your username and password.
Create a user
To login to Ozeki Phone System you need a user, that is the admin user, which is registered during the installation of Ozeki Phone System. So you already have one user, but let's see how you can add more. For this purpose move your mouse to the 'Connections' drop down menu and select Users.
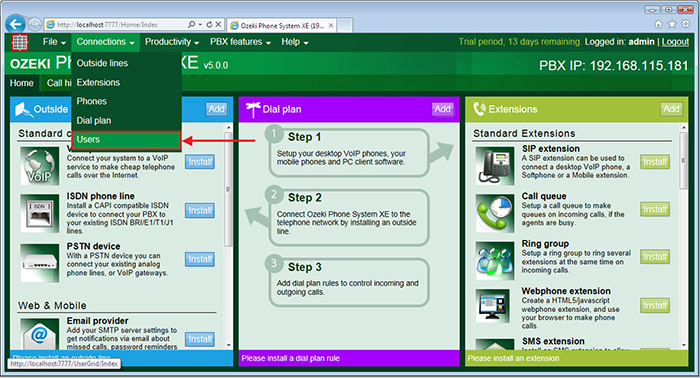
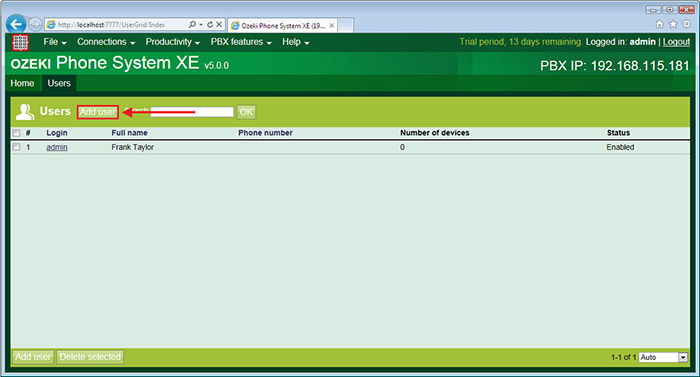
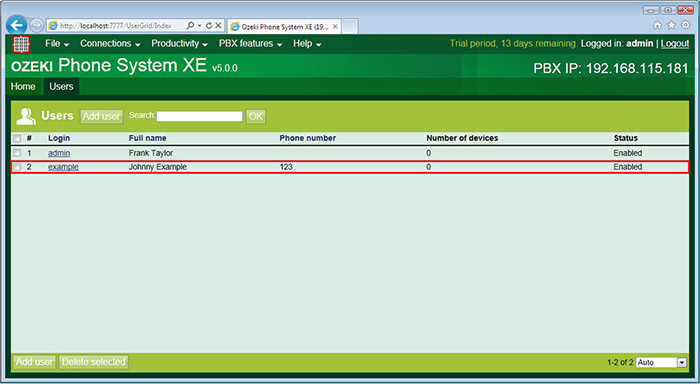
The Users window will appear where you can see your admin account that was registered during the installation of Ozeki Phone System. To add a new user click on the 'Add user' button as you can see it on the following figure.
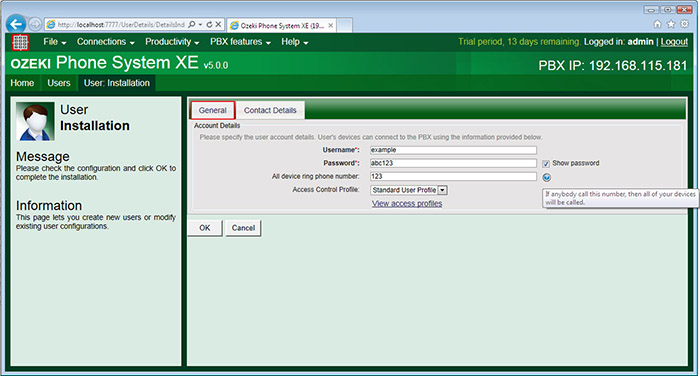
In the General tab of the user installation page you will have to give a username and password for the user. Then if you wish you can give a phone number to the user, if this number is called all devices of the user will ring. Finally you can select the 'Access Control Profile' of the user which is going to define what privileges the user has. In this case it is going to be the 'Standard User Profile'. You will find more information about the user privileges later on this guide.
As its name says you can set the contact details of the user in the 'Contact Details' tab of the user installation page.
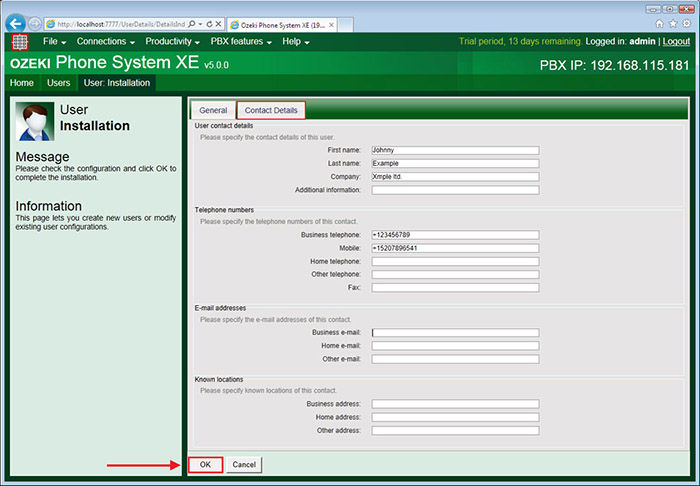
After you are finished with the configuration of the user click on the 'OK' button at the bottom of the page. Go back to the Users menu where the created user should appear.
User access profiles
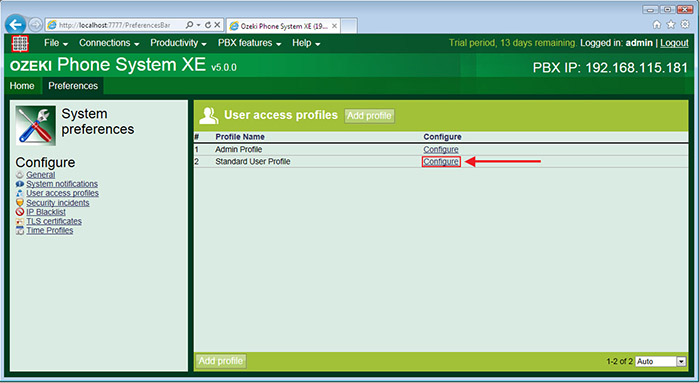
After the user for this example is created move your mouse cursor to the PBX features drop down menu and select Preferences. In the system preferences menu click on the 'User access profiles' on the left side of the screen. The User access profiles window will appear, click on the 'configure' next to the Standard User Profile.
In the configuration window of the Standard User Profile you will notice that you can rename the profile in the 'Profile name' section and that you can set the user privileges in the 'Access control' section with three checkboxes. The first, that is already marked can grant access to the GUI of the Ozeki Phone System to the user. The second allows the user to configure the Ozeki Phone System through an API. This can be the .NET API or the HTTP API. With the last the user can access and control the live calls of the selected user profile. Below this is the 'Members' section, where you can see the list of the current members and you can add new ones.
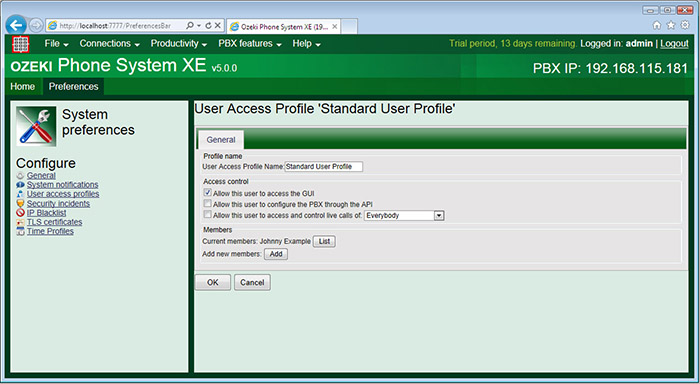
After you are ready with the configuration of the user profile click on the 'OK' button at the bottom of the page.
Addressbook
The created users (on the GUI of the PBX) are added to the User Addressbook Provider. For more information about the addressbook visit the page of the Addressbook configuration guide.
Addressbook permissions
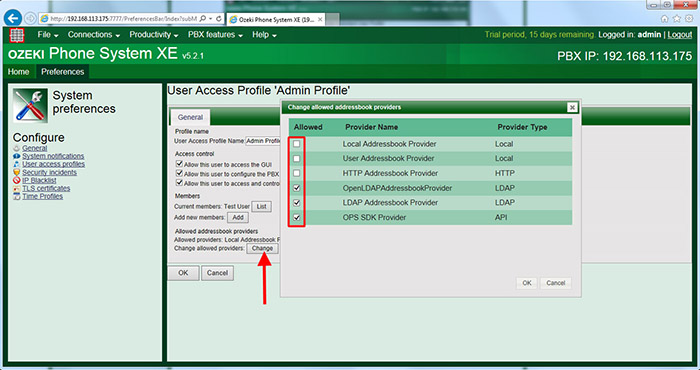
By default, each newly added addressbook provider is automatically allowed to every profiles. The following figure shows how it can be controlled. You only need to click on the 'Change' button in the Allowed addressbook providers section, then enable the checkbox belonging to the addressbook providers you wish to allow to this user profile. After you have enabled the addressbook providers, users can query and search the contacts of the selected providers.
The usage of the users
The users can be added to SIP extensions which means that the extension will belong to the selected user. This may be used if you want to contact the user, then all you have to do is call up the phone number which was assigned to the user. This way every extension that was assigned to the user will ring.
Another usage of the users is that you can send a voicemail to the e-mail address of the user that is assigned to the extension set in the voicemail.
Conclusion
You could see that it is really simple to create a new user in Ozeki Phone System. This user can be used to access the GUI of the PBX or to configure the PBX through an API or to access and control the live calls.
If you have any questions or need assistance, please contact us at info@ozekiphone.com
Dig deeper!
People who read this also read...
More information
- How to setup call recording in Ozeki Phone System
- How to setup voicemail service in Ozeki Phone System PBX
- How to setup e-mail messaging in Ozeki Phone System PBX
- How to setup an echo/sound test in Ozeki Phone System PBX
- How to provide an SMS Service to your customers
- How to select the language of text-to-speech feature
- How to create a dialer extension on Ozeki Phone System PBX
- System notifications
- How to manage office users in Ozkei Phone System
- Addressbook

 Sign in