Getting started with the .NET VoIP API
The following page will show you how easily you can develop your own .NET applications in the Ozeki Phone System XE. We will demonstrate the versatility and potential of developing in the Ozeki Phone System through compiling and modifying an autodialer in a few simple steps using the freely available Visual Studio IDE. Please download and install the Ozeki Phone System, if you haven't done it already, to make sure that you will be able to follow this tutorial.
You will see how easily you can open, compile and modify your custom .NET applications. Please check out the following list to see what you will need if you wish to follow this tutorial:
Prerequisites:
- The Ozeki Phone System installed on your PC
- Visual Studio Express (or better)
Document outline
Step 1: Install an API ExtensionStep 2: Open the Examples folder
(find at: C:\Program Files\Ozeki\Ozeki Phone System\Examples\.NET API)
Step 3: Copy the "Common" and the "Examples\OPSAutoDialer" folder into the C:\WorkAutodialer folder
Step 4: Open the project in Visual Studio
Step 5: Compile and run the project
Step 6: Modify the project
Step 7: Recompile and rerun the project
| Video tutorial: |
|
How to develop Ozeki Phone System applications using Visual Studio and the .NET framework |
Step 1. Install the API Extension
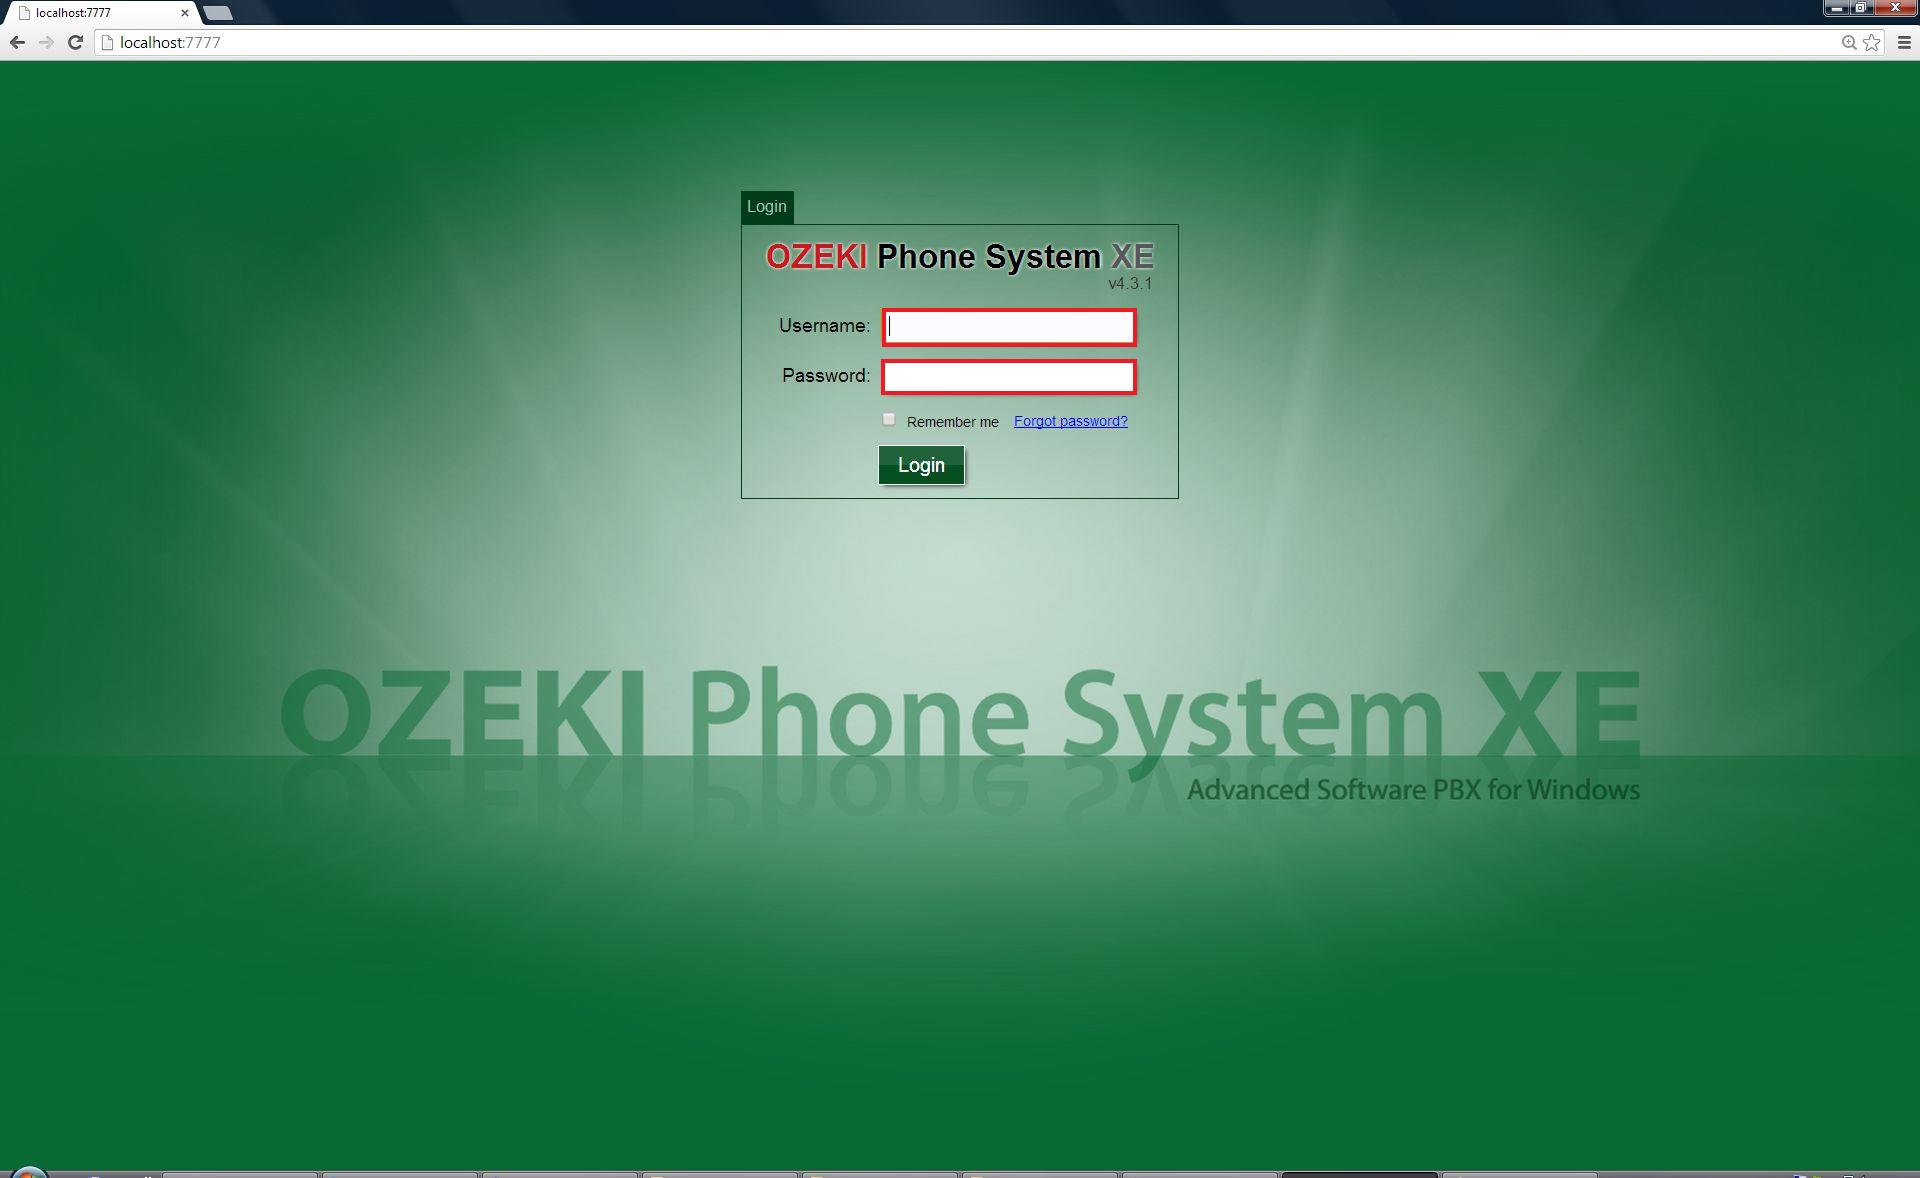
First of all, you need to login to your installed Ozeki Phone System with your username and password (Figure 1).
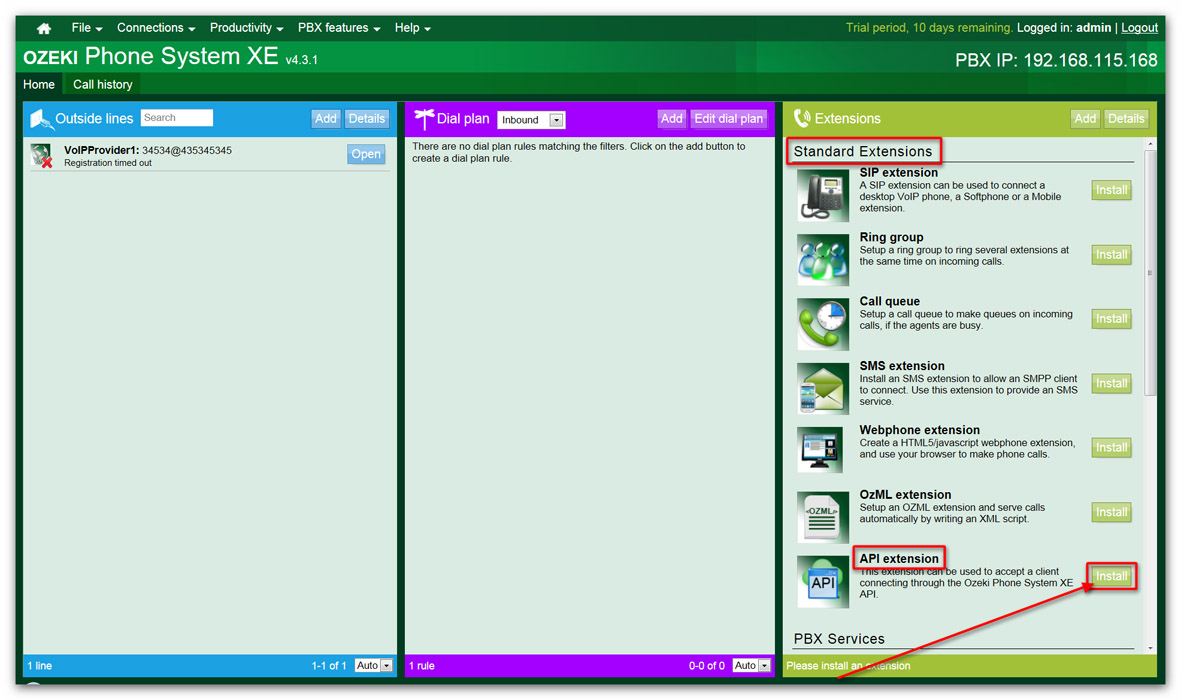
After that, you have to install a new API Extension. On the right side of the screen you can see a green box named "Extensions". There you can find all the extensions you can install in your Ozeki Phone System. For the purposes of this example, you have to choose the API Extension option, it is the last item in the list of "Standard Extensions". You can do this by clicking the "Install" button (Figure 2).
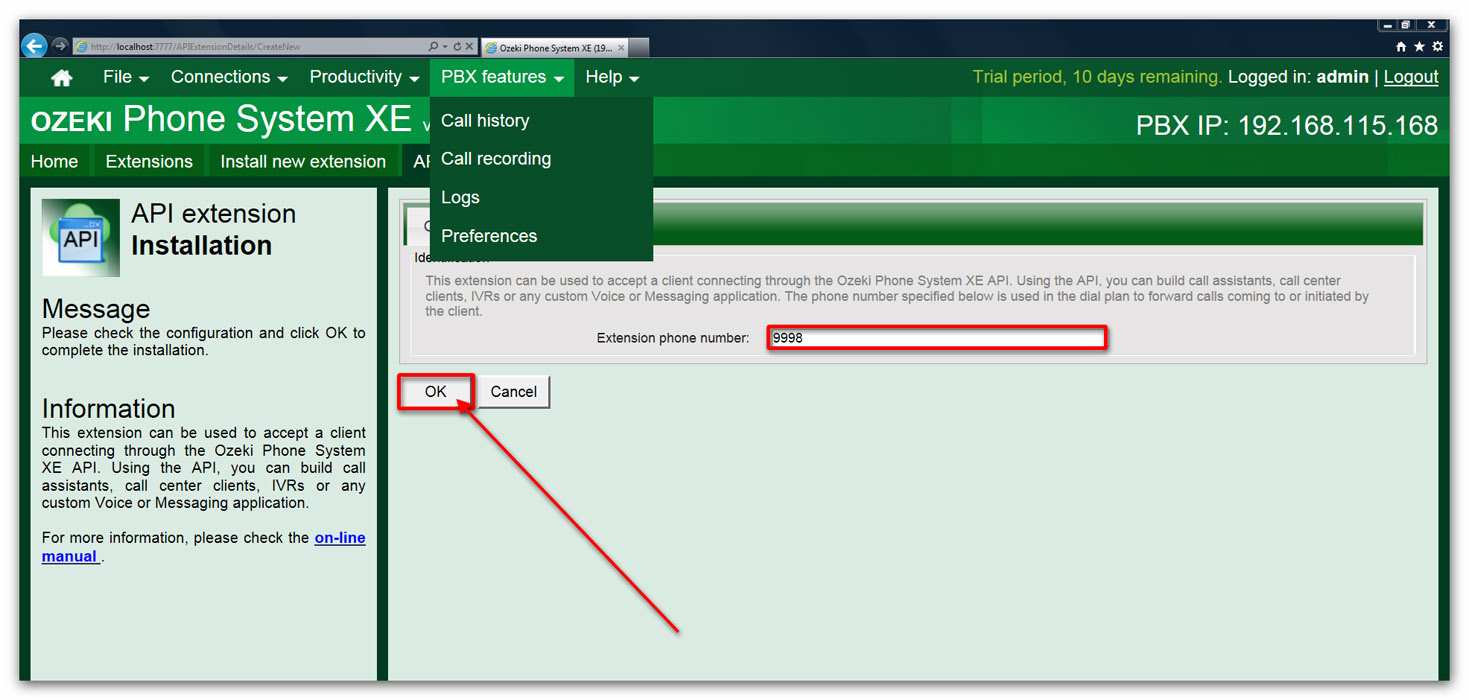
On the following tab you will see a textbox labeled "Extension phone number". Here you can provide the phone number for your extension. If you are done with this by clicking the "OK" button your API Extension is installed in the Ozeki Phone System (Figure 3). Now you are ready to enhance its functionality using the power of the .NET framework.
Step 2. Open the Examples folder
If you have the Ozeki Phone System installed on your computer, you will find the Examples folder on the following path(Figure 4):
C:\Program Files\Ozeki\Ozeki Phone System\Examples\.NET API
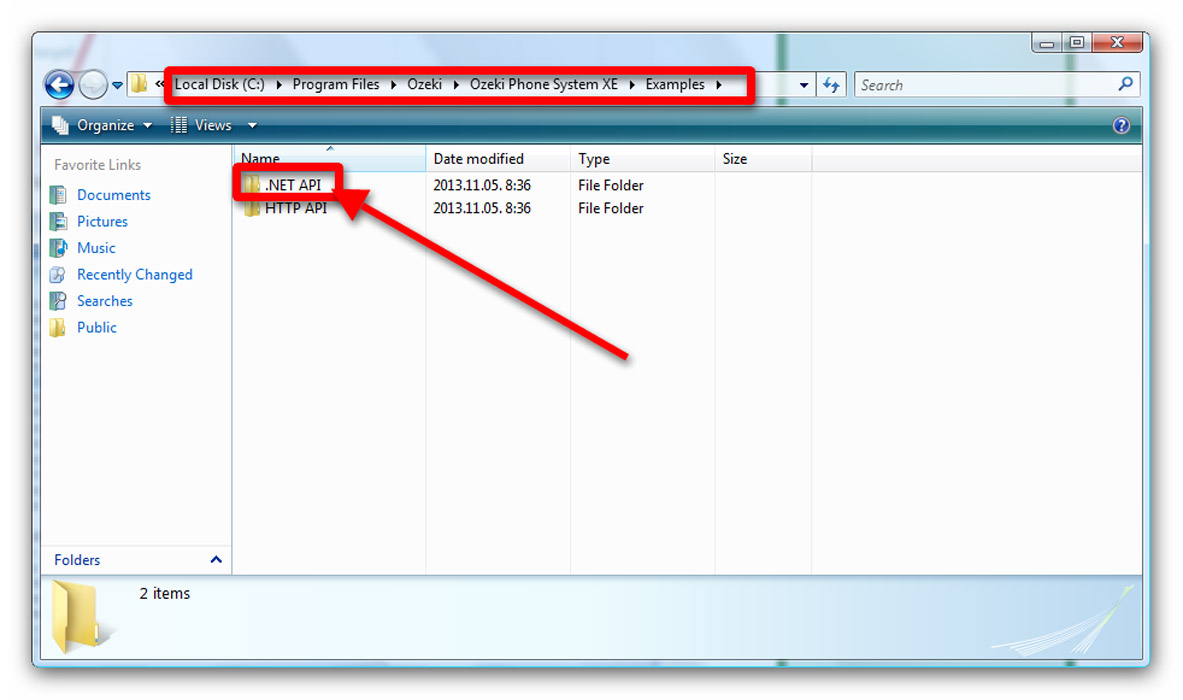
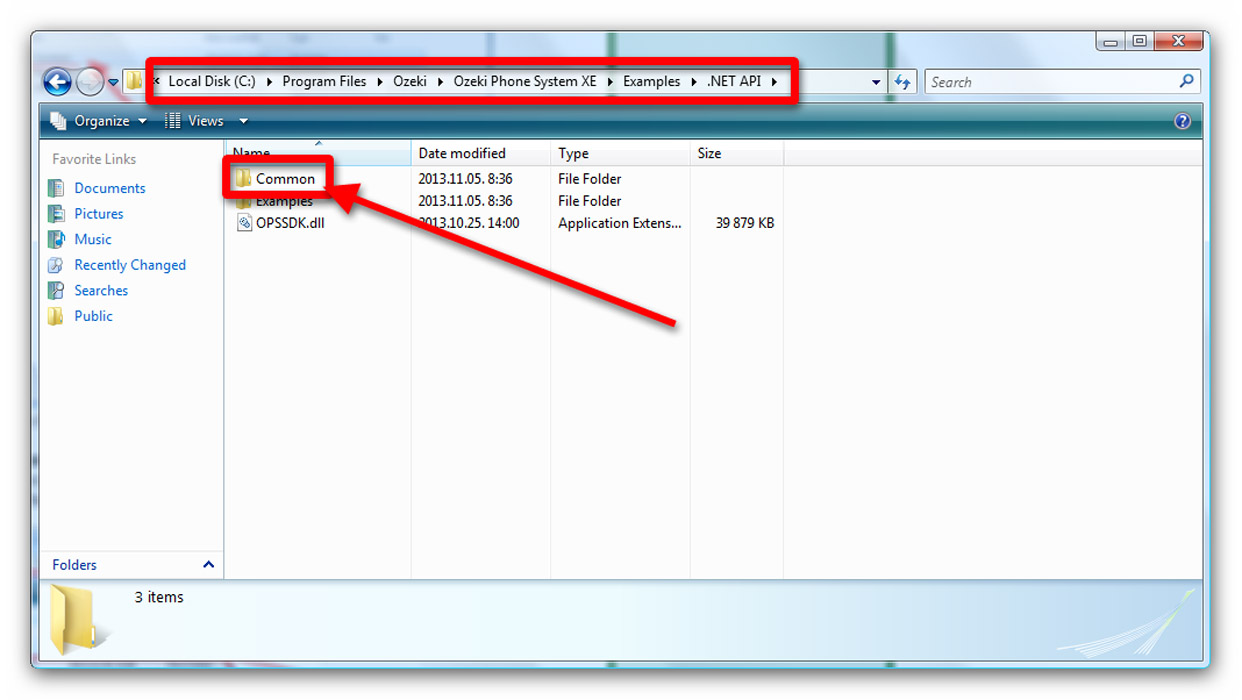
In there you will find a "Common" and an "Examples" folder. In the "Examples" folder there are many projects you can use to understand better the working and potential of the Ozeki Phone System development with .NET API. In this tutorial we will use the OPSAutoDialer example (Figure 6).
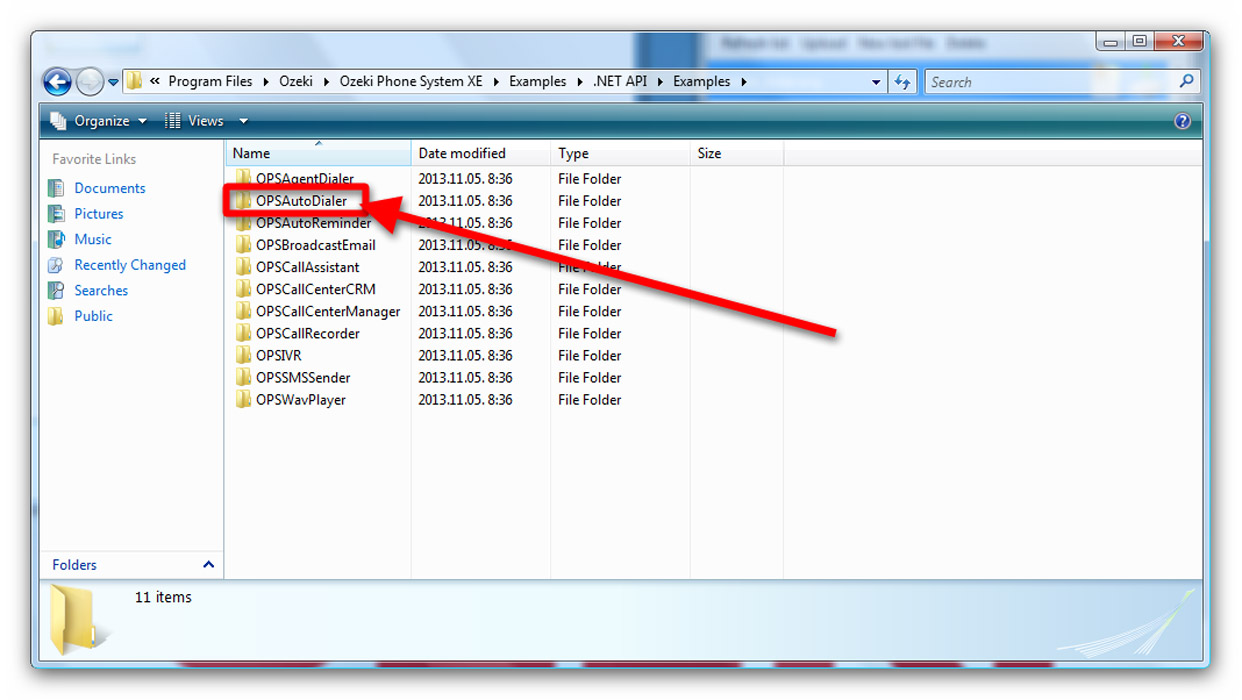
Step 3. Copy the "Common" folder and the "Examples\OPSAutoDialer" folder into the "C:\WorkAutoDialer" folder
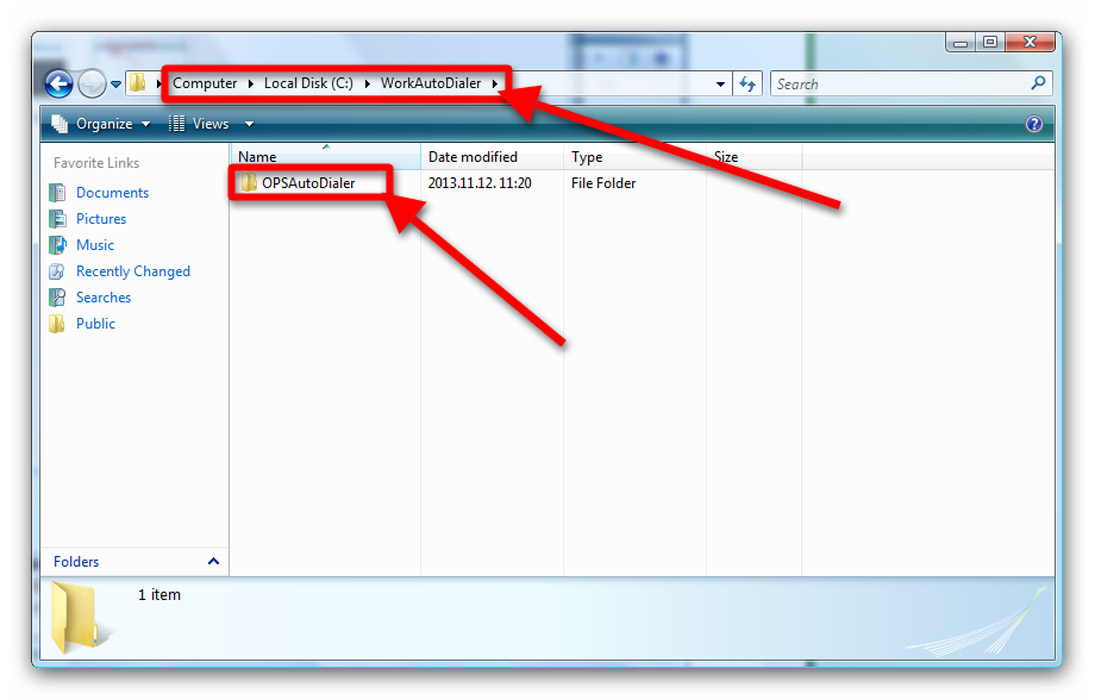
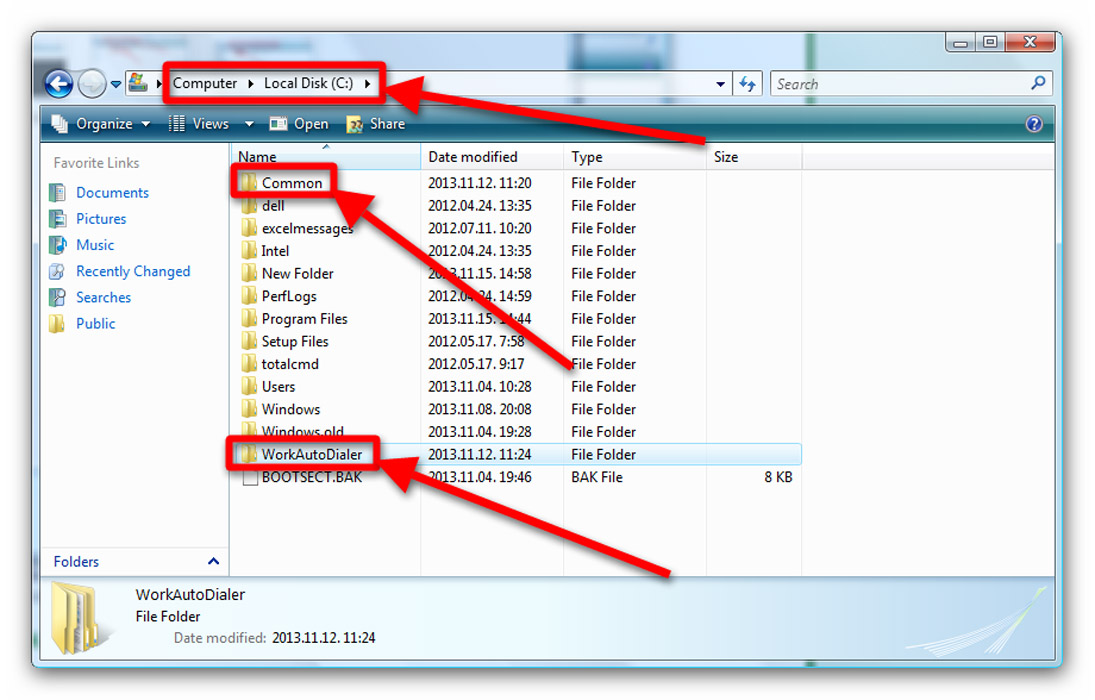
Create a folder named "WorkAutoDialer" on your C:\ drive. This is the folder we will use when working with the autodialer example. From the .NET API\Examples folder copy the OPSAutodialer project here and the .NET API\Common folder to the parent directory of your "WorkAutoDialer". In the case you follow along with this tutorial it is the root directory of your C:\ drive. Figure 7 shows the result of copying the OPSAutodialer folder.
Now you are done with all the necessary steps you have to make before starting the development of your application. Therefore next you have to launch your Visual Studio Express (you can use a better version too, of course).
Step 4. Open the project in Visual Studio Express
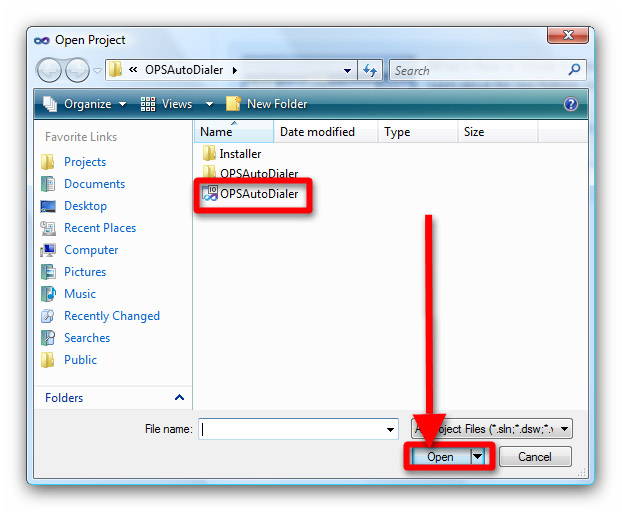
Start the Visual Studio! Open the example project by choosing the "Project/Solution" option in the "File" menu "Open" submenu, and after that navigating in the "Open project" dialog box to the location of the OPSAutoDialer projectfile in your WorkAutoDialer folder's OPSAutoDialer subfolder, then double clicking it or clicking the "Open" button (Figure 9).
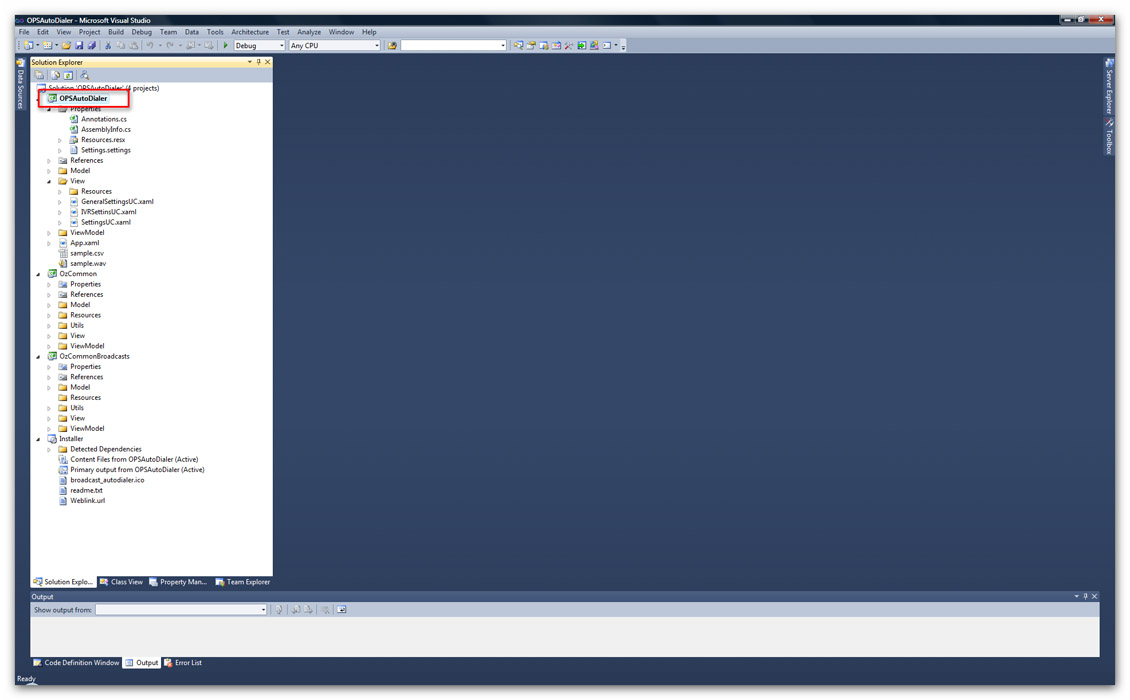
If the opening of the solution is succesful, you will see 4 related projects. We are interested in the first named OPSAutoDialer. (Figure 10)
Step 5. Compile and run the project
You can study the source code if you wish. If you want to compile the program and see in action how does it work, it is really easy to do. Click on the "Debug" menu on the top row of the Visual Studio window, and from the drop down menu choose the "Start without debugging" option. The compiler will build the solution (this may take some time depending on the capacity of your computer, so be patient) and it will start immediately. You will see the starting page of the Autodialer window (Figure 11).
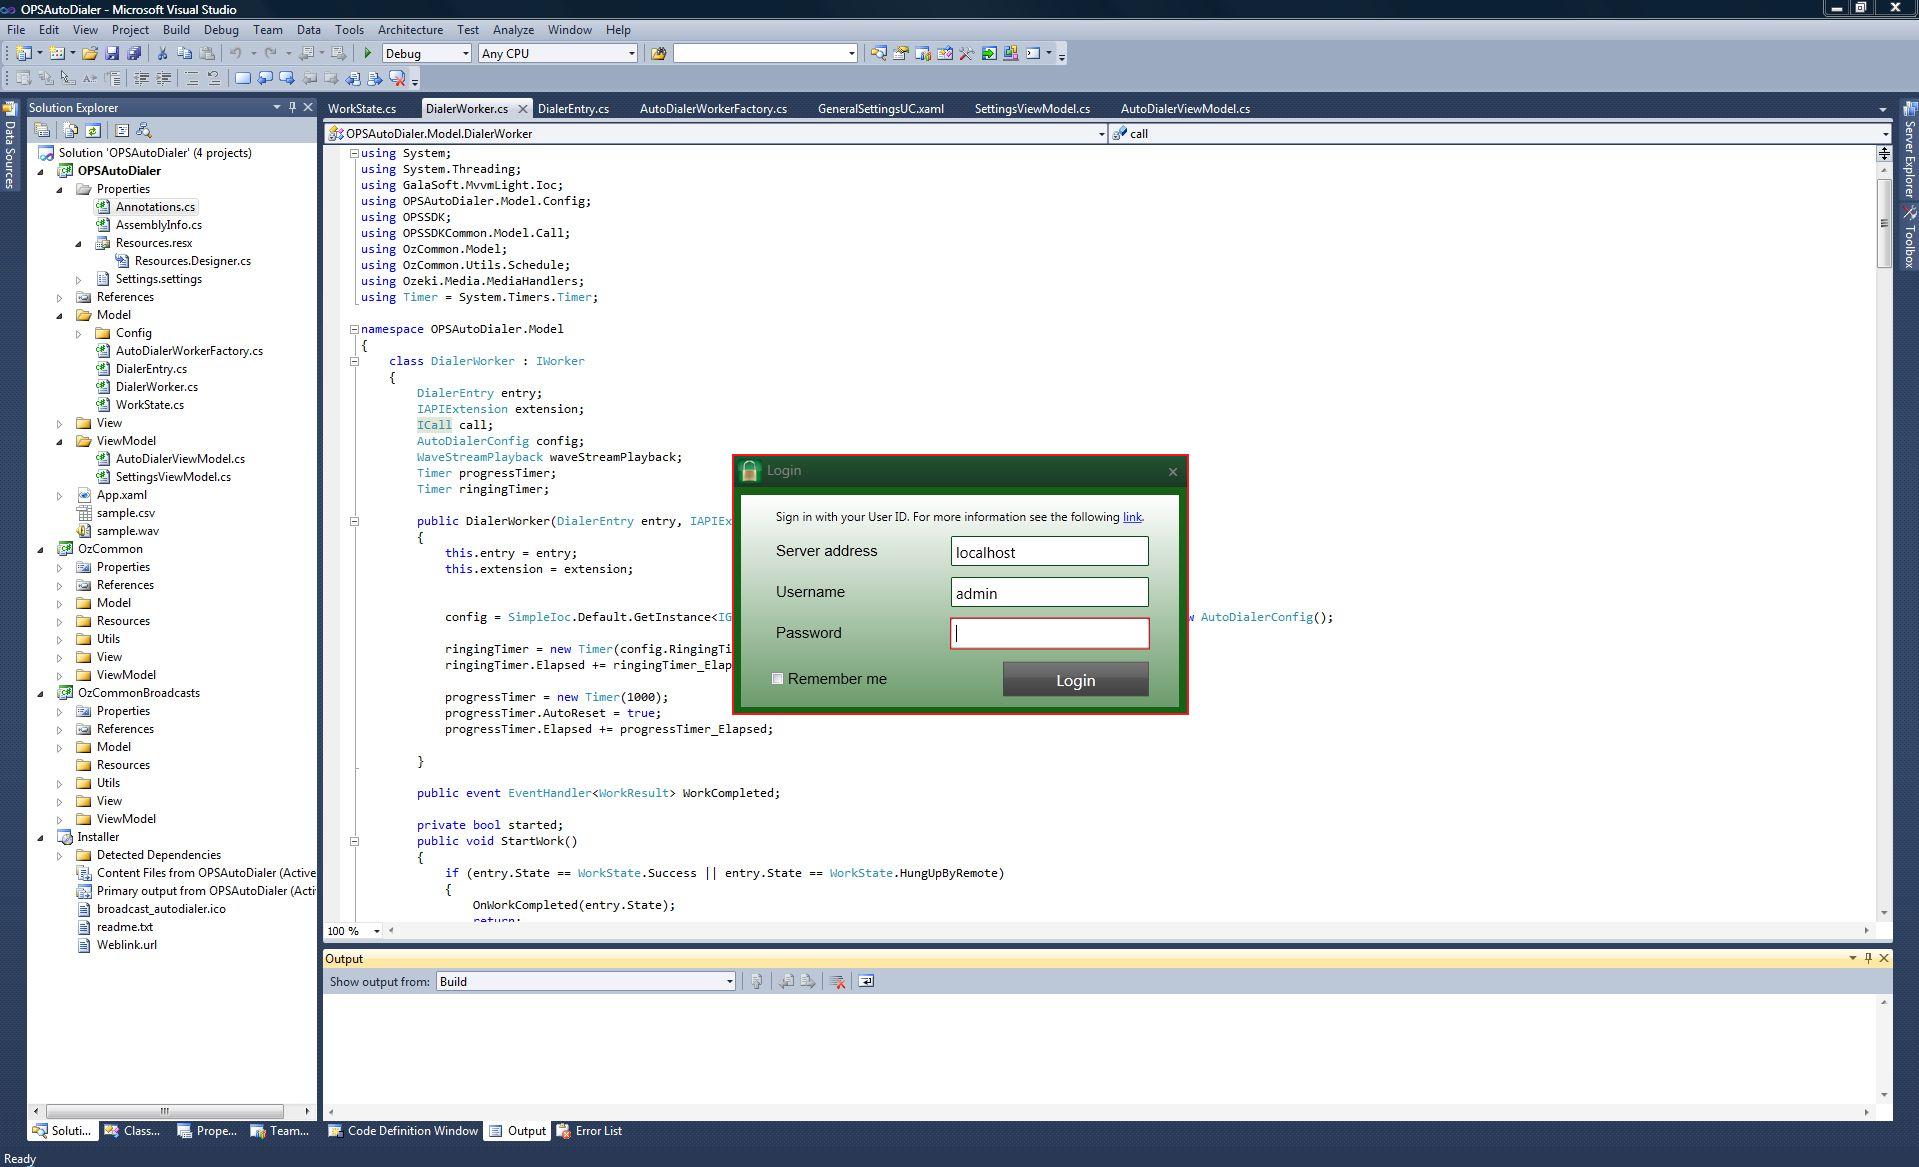
If you only want to compile the project, you can choose the "Build solution" option from the "Build" menu in the top row next to the Debug menu. This way the source will compile and you can see the messages from the compiler but your project won't start to run. However, if the autodialer application started, you can test-drive it with the API Extension created in the first step of this tutorial. For further information,please follow this link: information for testing the Autodialer tool.
Step 6. Modify the project
You can also freely modify the source code of the dialer if the default behaviour does not satisfy your needs. Let's see a very basic example how you can do this in Visual Studio. Suppose you don't like the default appearance of the settings window in the Autodialer, so you want to redesign it according to your taste. For the default look see Figure 12.
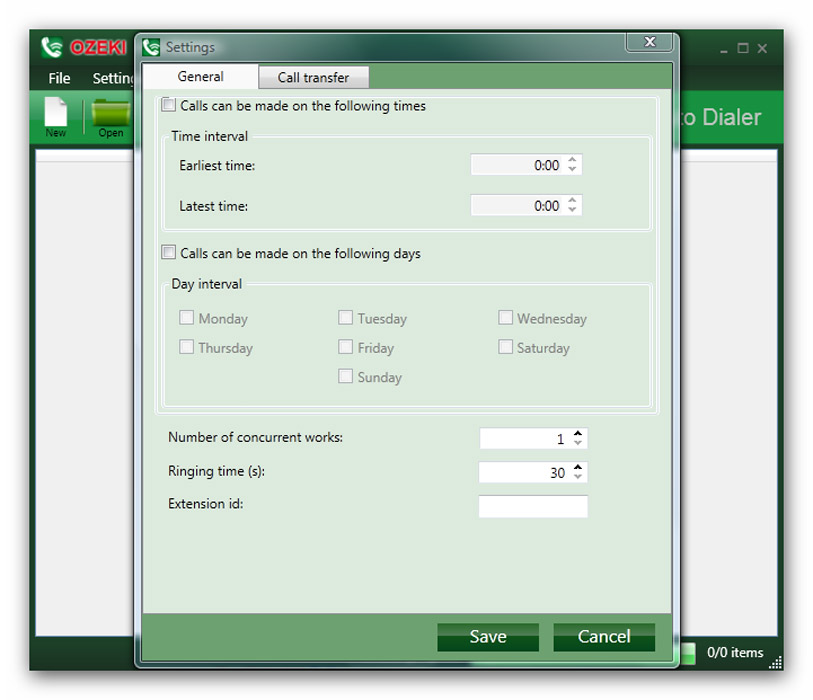
First select the OPSAutoDialer project in the "Solution explorer" window of your Visual Studio. You can see every source file pertaining to this project. A few of them are in folders like "Model", "View" and "ViewModel". You will need the contents of the "View" folder (Figure 13).
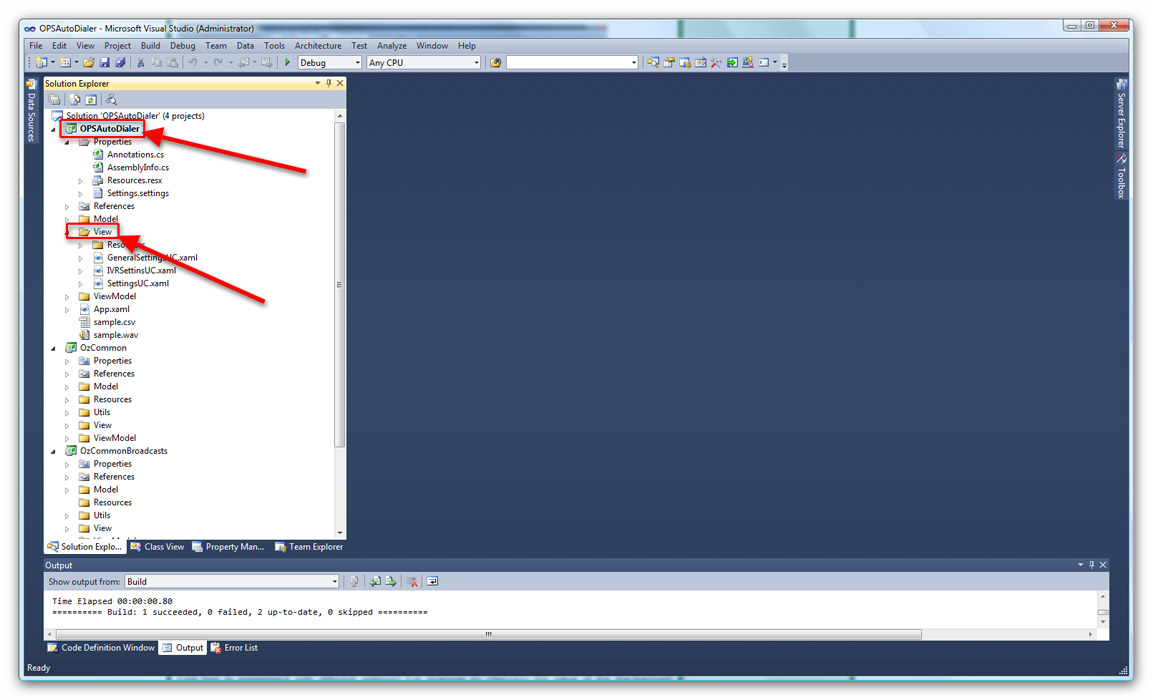
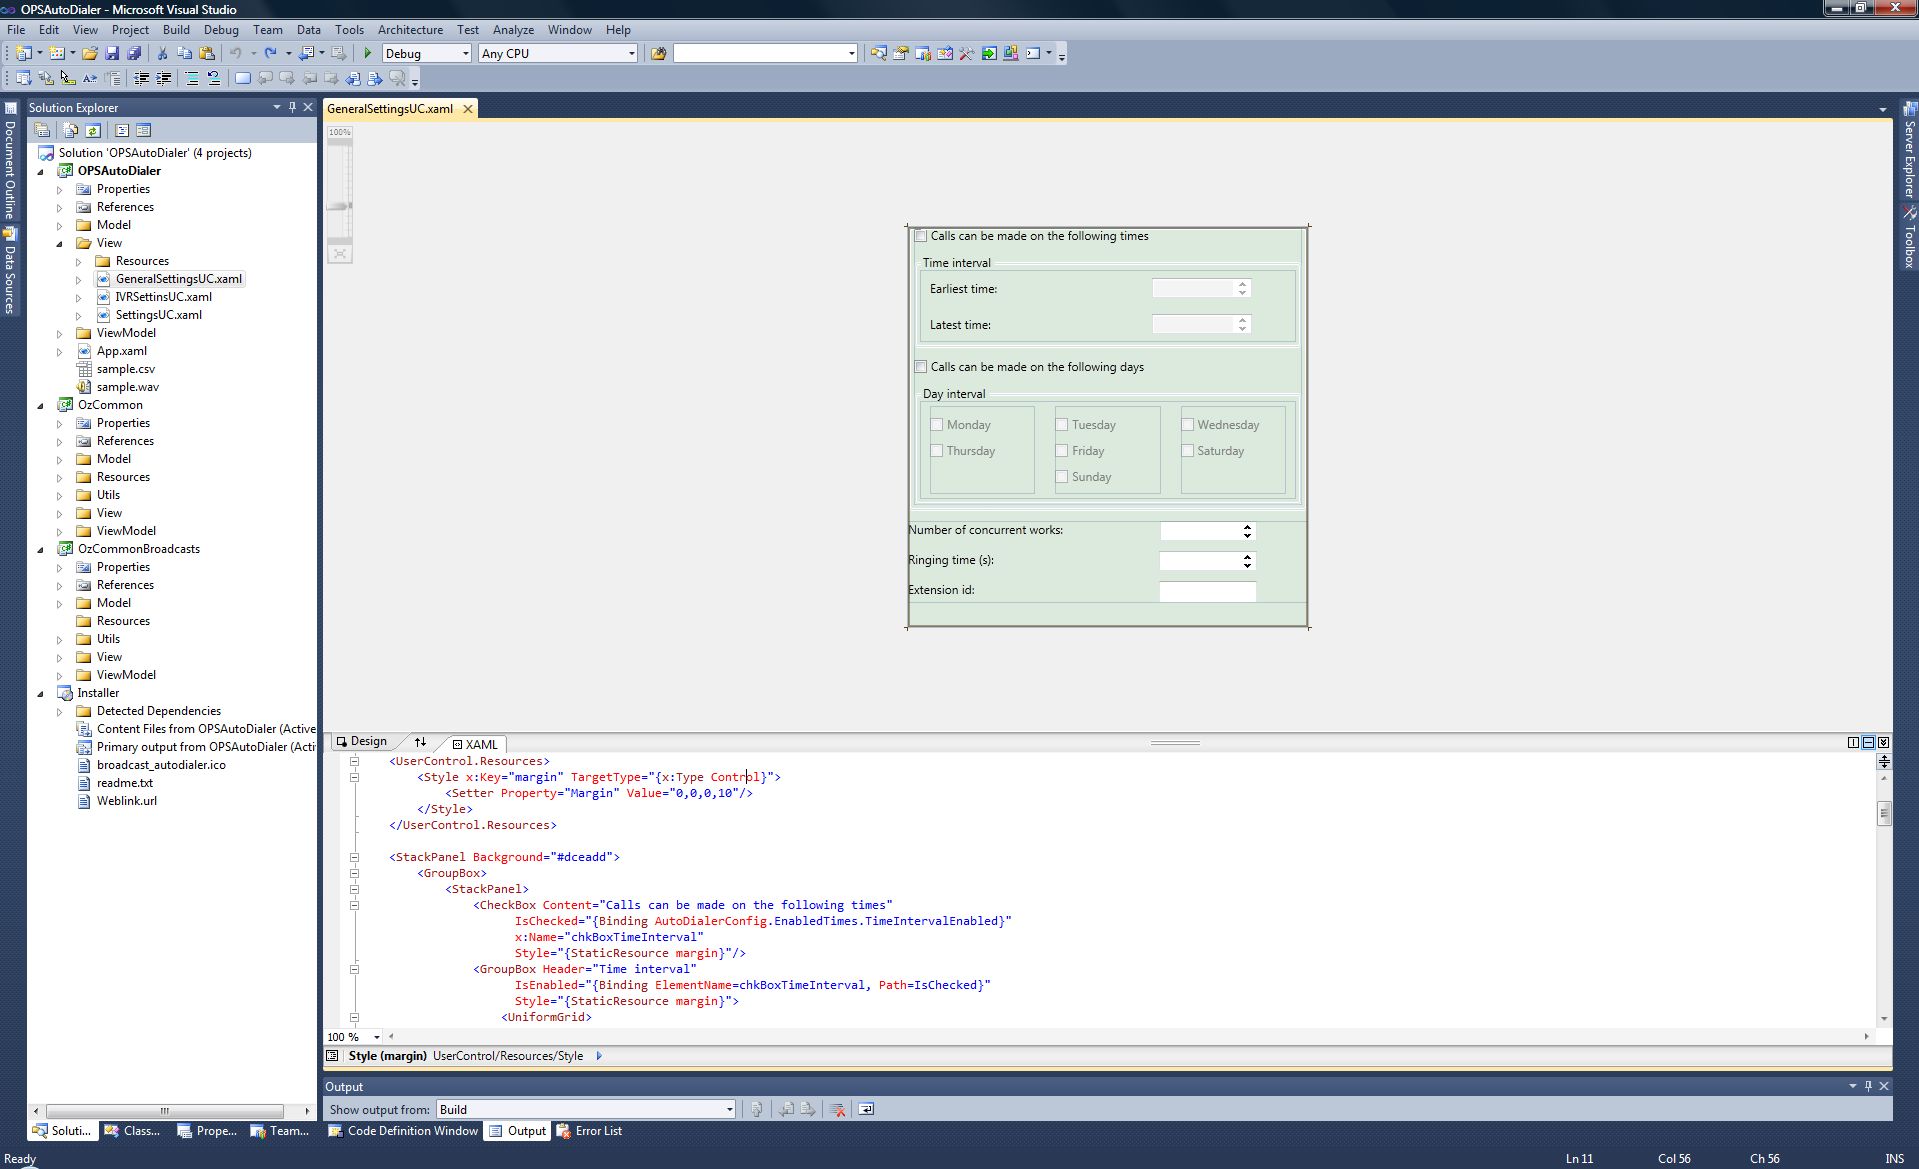
You can see a little white triangle before the name of the folder. If you click it, it will become black and the contents of the folder show in a tree-like layout. There you can find another folder and three source files. Double click on the one named GeneralSettingUC.xaml. On the top half of your window you will see the current appereance of the settings window of the autodialer program and below that the source code written in a version of XML which is used for the easy and efficient design of GUIs (Figure 14).
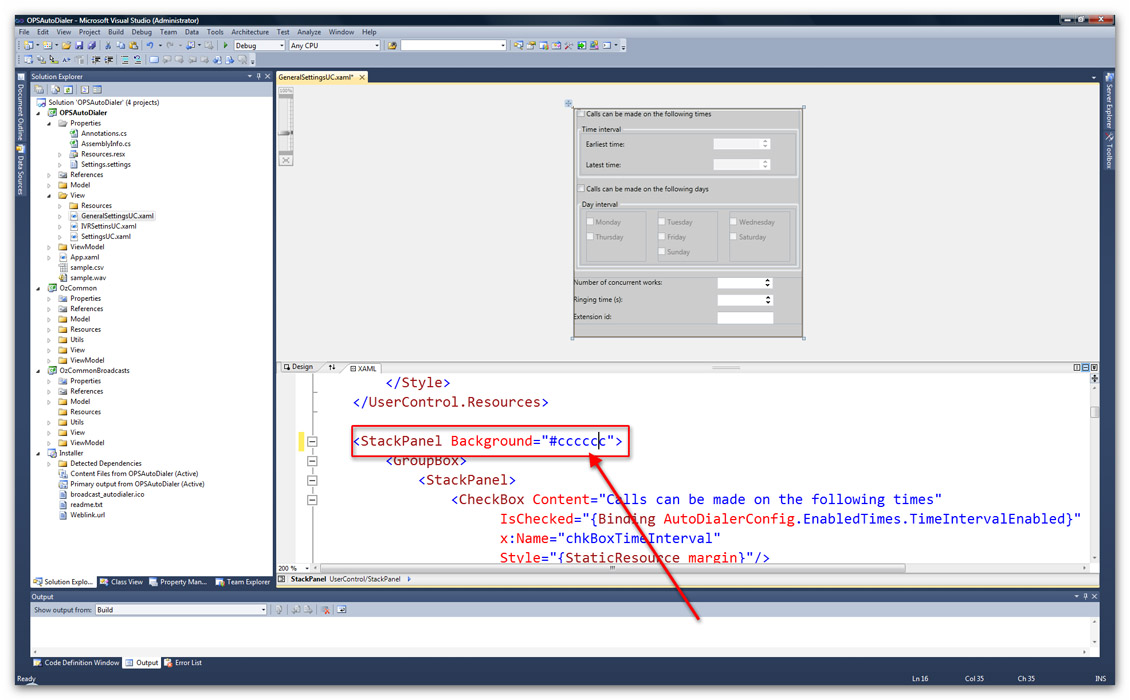
Feel free to experiment with different settings! For example by changing the value of the Background attribute of the StackPanel node to "#cccccc", you can set a grey background for the panel (Figure 15).
However plese keep in mind that it is only a very simple example of what you can modify in this project, and it is written only with demonstrative purposes! After you feel comfortable with the structure and the logic of the code you can rewrite it in any way you see appropriate for your specific system environment.
Step 7. Recompile and rerun the project
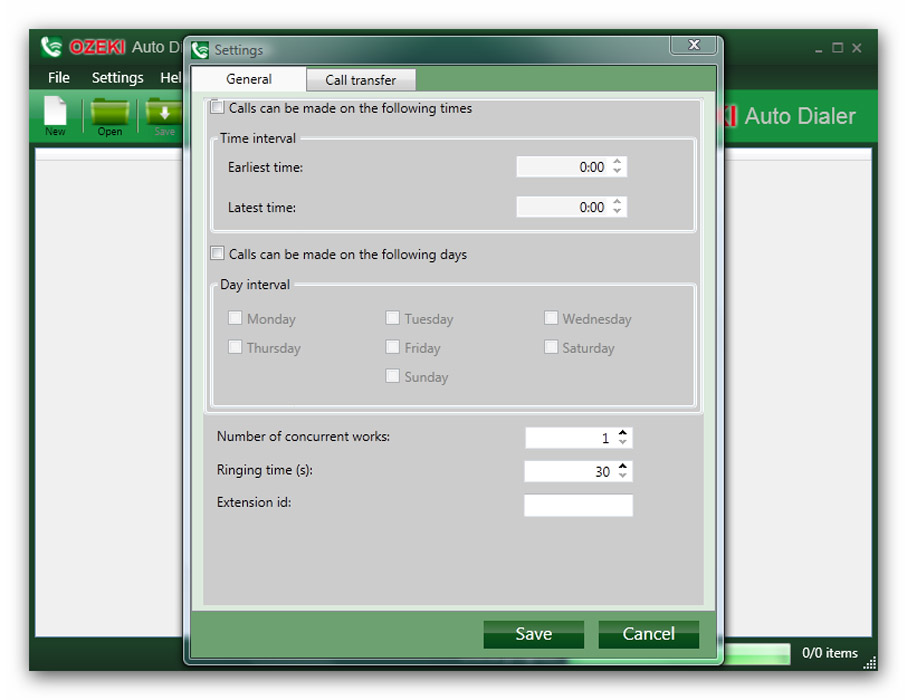
If you are done with the modifications, you can recompile the source code the way you've seen it in step 5. This way you can examine the result of your modifications. Returning to our previous example, after modifying the background color and recompiling the code, the settings tab will appear with a grey background from now on (Figure 16).
The most important thing to remember is that you should not use the examples as black boxes, but you can get to know their inner workings to gain a better understanding of the way they provide you the functionalities you need. Armed with this knowledge the Ozeki Phone System becomes an amazingly versatile and efficient tool in your hand to make the most out of the communication processes of your organisation.
Conclusion
This tutorial introduced you to developing your Ozeki Phone System with the help of .NET applications. We used the autodialer example as the test specimen to open, compile and run an existing project. Through the same project we showed the modification of a program as well. If you payed close attention to this guide, you already have every necessary information to start to develop your own .NET applications based on the examples provided by the Ozeki Phone System, thus tailoring to your needs and enhancing the functionality of an already powerful and sophisticated tool.
For more information or assistance, please contact us at info@ozekiphone.com
Dig deeper!
People who read this also read...
- Ozeki Phone System, the PBX for developers
- Ozeki VoIP .NET API
- C# .NET VoIP developers 101
- Broadcast by Phone
More information
- Develop your own .NET VoIP API easily with Ozeki Phone System PBX
- NuGet Package Manager for PBX

 Sign in